Upgrading Your Camera Lens — Do You Need To Yet?
Upgrading your camera lens can open up a completely new world of photography, especially if you enjoy photographing the night sky. But is buying another lens really necessary, and how do you decide which one is right for you?
Those of us who have spent time photographing the skies and the world around us will probably remember the first occasion when we considered adding something new to our equipment. Perhaps it was a filter, an intervalometer, a cleaning kit or a sturdier tripod. Eventually, though, most photographers begin to wonder about buying another lens.
I reached that point myself. I wanted to capture more detail in distant objects and experiment with different types of photography. However, buying a new lens can be an expensive step, and there are several things worth considering before spending your money.
In this article, I want to share some of my own experiences and offer practical advice for anyone thinking about upgrading their camera lens for astronomy.
Do You Really Need a New Lens?
Before looking at new equipment, I would suggest asking yourself one simple question: what can your present lens not do?
Many DSLR and mirrorless cameras are sold with a standard zoom lens, often referred to as a kit lens. It may not look particularly impressive compared with some of the large telephoto lenses advertised online, but that does not mean it is unsuitable for astronomy.
A standard lens can be very useful for photographing constellations, the Milky Way, the Moon in a landscape, and wide areas of the night sky. In fact, for some types of astrophotography, a shorter focal length is an advantage because it captures a wider field of view.
If you are still learning how to focus on stars, control exposure times or use your camera’s manual settings, you may benefit more from practising with your existing lens than from buying another one immediately.
However, if you find that the Moon appears too small in your photographs, or you want to concentrate on smaller areas of the sky, a longer lens may be worth considering.
The important thing is to identify what you want to photograph before deciding what equipment to buy.
Knowing Your Camera
Before you start looking for a replacement or additional lens, make sure you understand your camera and its lens fitting.
DSLR and interchangeable-lens mirrorless cameras are designed to accept different lenses, but not every lens will fit every camera. Manufacturers use different mounting systems, and even cameras made by the same manufacturer may use different fittings.
For example, Canon DSLR cameras commonly use EF or EF-S lenses, while Canon’s newer EOS R mirrorless cameras use the RF system. Nikon DSLR cameras generally use F-mount lenses, while Nikon Z mirrorless cameras use Z-mount lenses. Sony also has its own lens systems.
This does not necessarily mean that an older lens cannot be used on a newer camera. Adapters are available for certain combinations, but compatibility must be checked carefully. Some adapters preserve electronic communication between the camera and lens, while others may require manual focusing or aperture control.
Before ordering anything, find out the exact model of your camera and confirm that the lens is compatible with it. A bargain is not much use if the lens cannot be fitted properly.
My First Lens Upgrade
When I first considered upgrading my equipment, I had to decide what sort of lens would be most useful. Should I buy a fixed focal length lens, or would a zoom lens give me more flexibility?
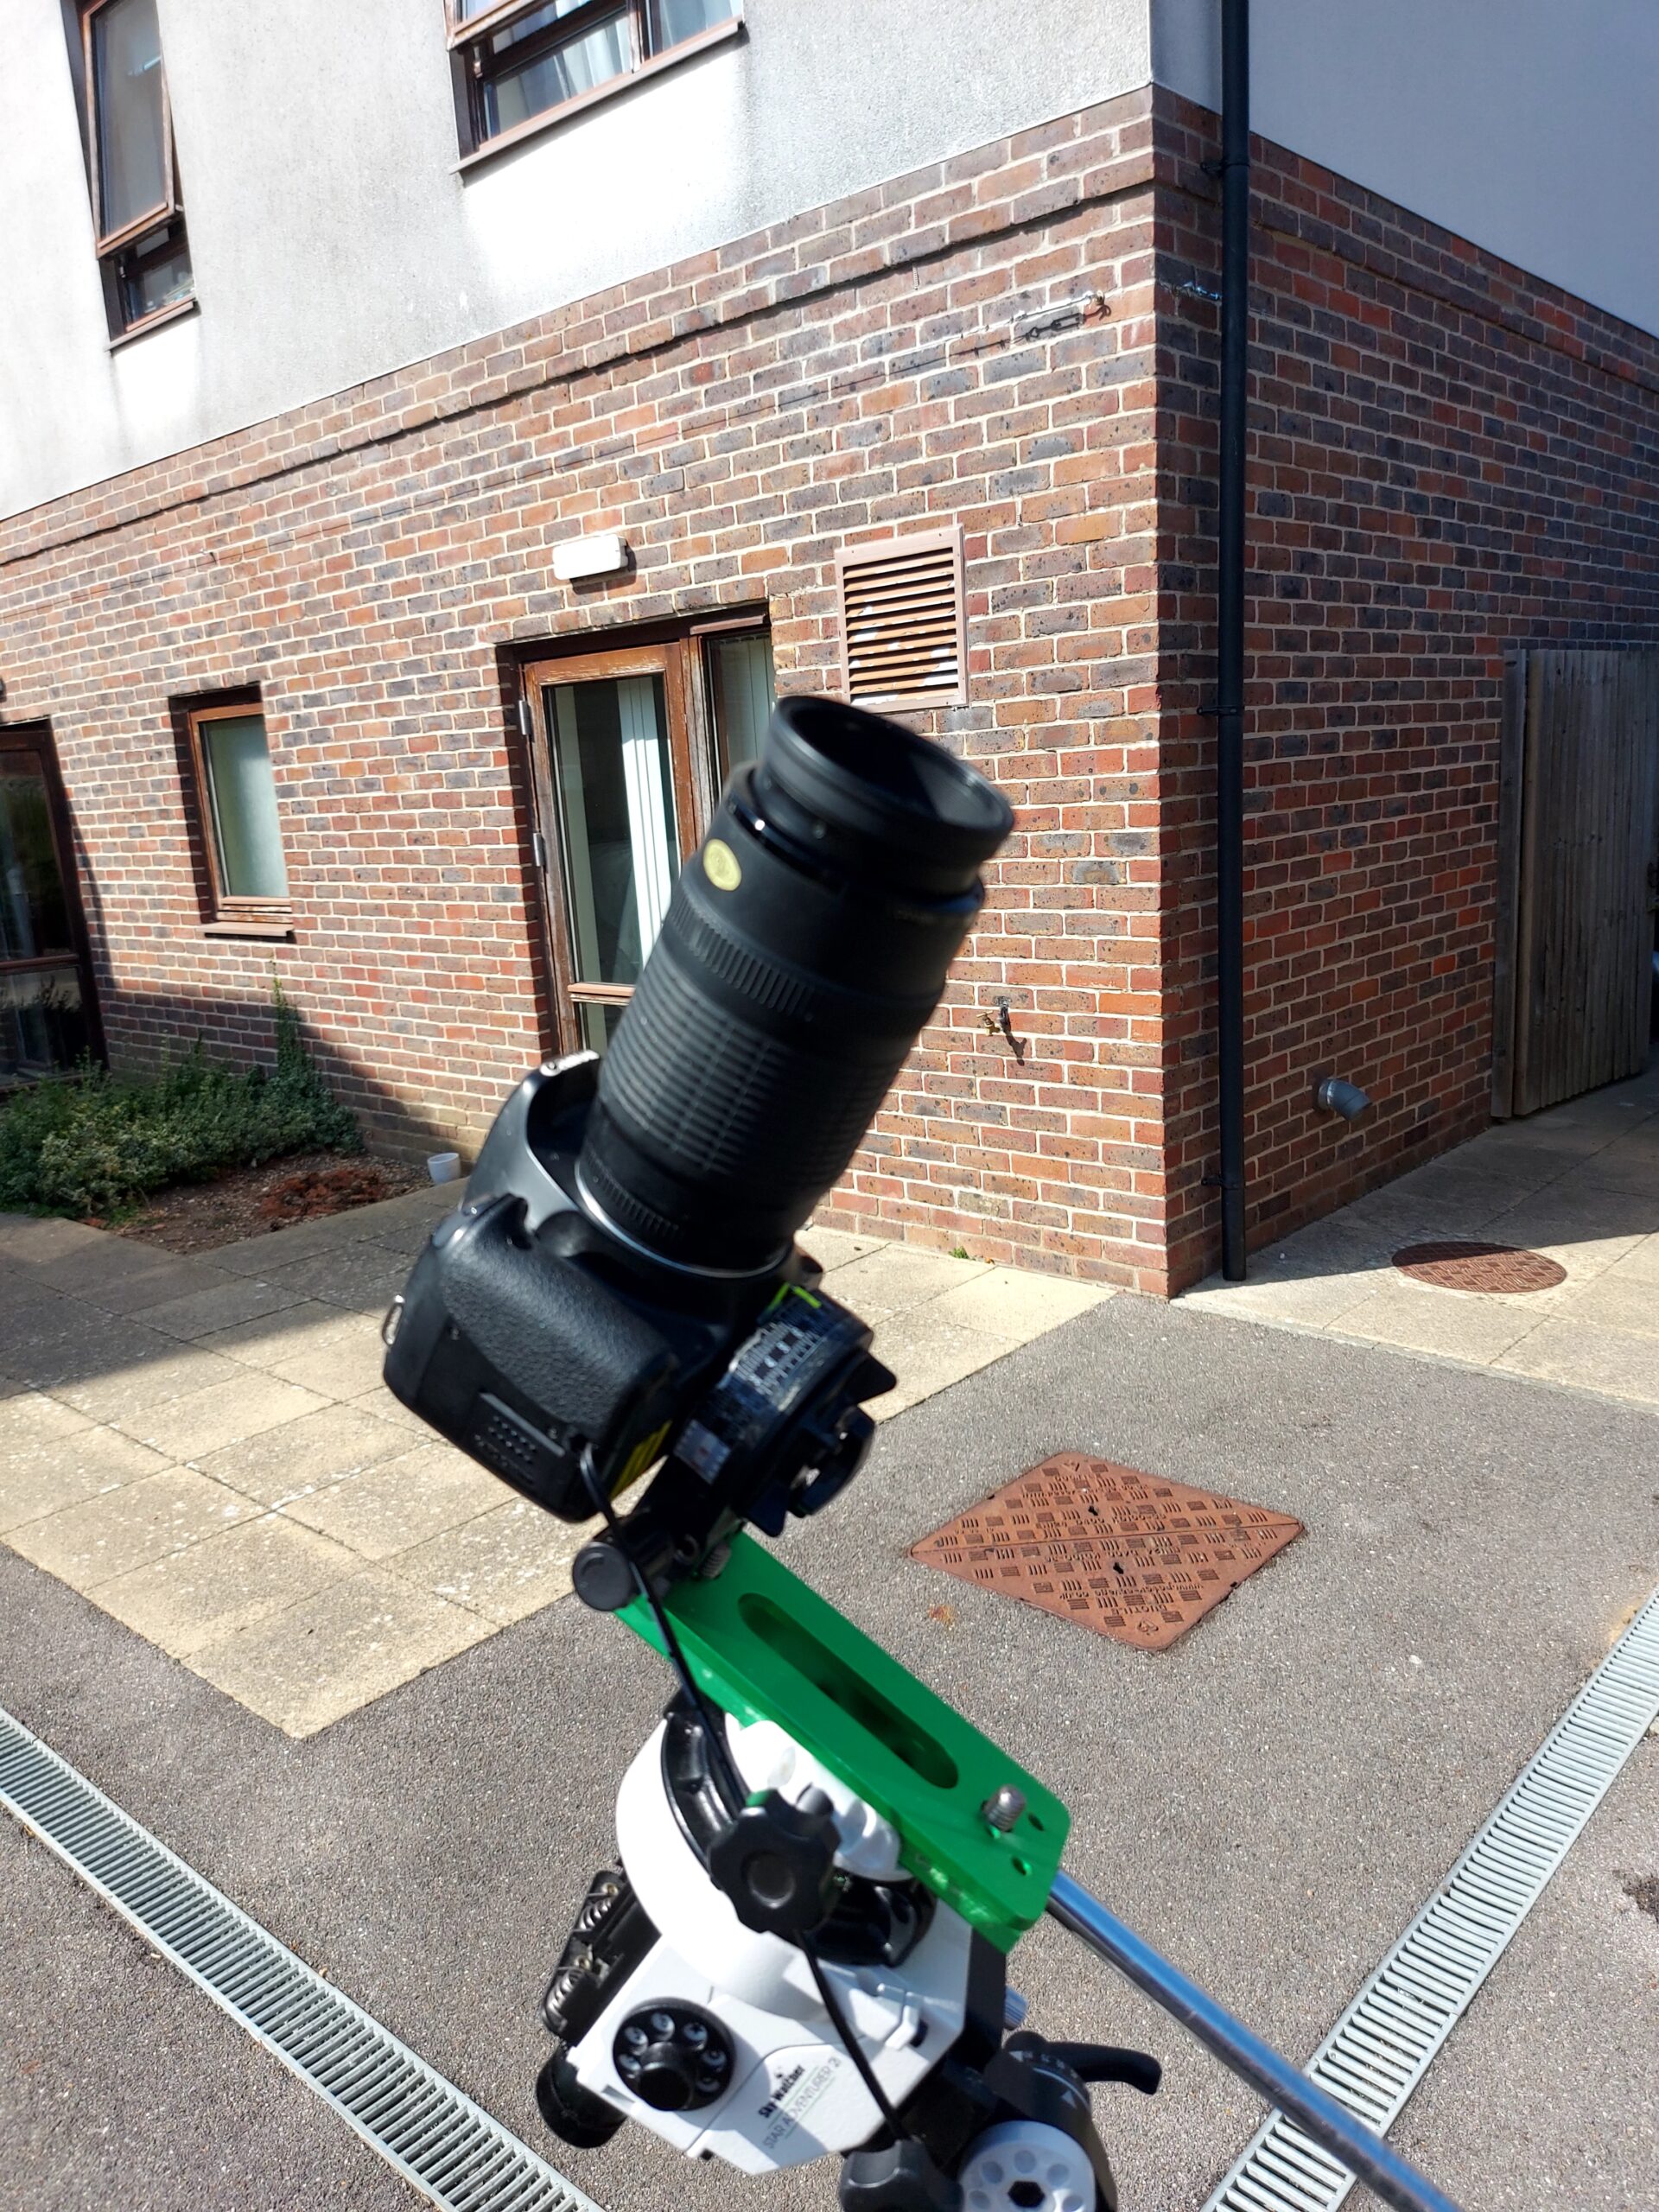
My main interest was obtaining more detailed photographs of distant subjects, so I decided to start with a Canon 70–210mm telephoto zoom lens.
This gave me a useful range of focal lengths without having to change lenses every time I wanted a different composition. At the shorter end I could include more of the surrounding scene, while at 210mm I could concentrate on a smaller subject.
For someone beginning to experiment with longer focal lengths, I found this a sensible direction to take.
Later, I moved on to a much longer lens with a focal length ranging from 420mm at f/8 to 800mm at f/16. This allowed me to experiment with subjects that appeared much smaller through my earlier equipment.
Between these two lenses, I had a useful range for the sort of photography I wanted to explore.
However, I would not suggest that every beginner should immediately purchase an extremely long lens. There are advantages and disadvantages to increasing focal length, particularly when photographing the night sky.
Fixed Focal Length or Zoom Lens?
One of the first choices you will encounter is whether to buy a prime lens or a zoom lens.
A prime lens has a fixed focal length. For example, a 50mm lens remains at 50mm, while a 135mm lens remains at 135mm. Prime lenses are available in both wide-angle and telephoto designs.
A zoom lens allows you to change the focal length without changing the lens itself. A 70–210mm lens, for example, provides a range of different fields of view.
For general photography, a zoom can be extremely convenient. You can photograph a landscape, change the focal length and then concentrate on a more distant subject.
For astrophotography, the choice is slightly more complicated. Some prime lenses offer wider maximum apertures and very good optical performance, making them attractive for photographing faint stars and wide areas of the Milky Way.
A zoom lens offers flexibility, but it may not collect as much light at its maximum aperture as a faster prime lens.
Neither type is automatically better. The right choice depends on the subjects you want to photograph and the equipment you already own.
Understanding Focal Length
Focal length is usually measured in millimetres and is one of the most important figures you will see when comparing lenses.
A short focal length, such as 18mm or 24mm, provides a wide view. This is useful for photographing constellations, large areas of the Milky Way and night landscapes.
A medium telephoto lens, perhaps 100mm to 200mm, captures a smaller section of the sky. It can be useful for larger star fields and certain deep-sky subjects, particularly when used with suitable tracking equipment.
Longer focal lengths, such as 400mm or 800mm, give a much narrower view. They can be useful for photographing the Moon and some smaller astronomical subjects, but they also make camera shake, focusing errors and the Earth’s rotation more noticeable.
It is easy to assume that a longer lens must produce a better photograph. Unfortunately, that is not always the case.
A well-focused photograph taken with a modest lens can be far more satisfying than a blurred photograph taken with an expensive telephoto lens.
Why Aperture Matters
Another important figure is the lens’s maximum aperture, usually expressed as an f-number, such as f/2.8, f/4, f/5.6 or f/8.
The f-number describes the relationship between the focal length and the effective diameter of the aperture. For the same exposure time and scene, a lower f-number generally allows more light to reach each part of the camera sensor.
This is particularly important when photographing faint stars or the Milky Way, where collecting light is essential.
A lens operating at f/2.8 can be useful for wide-field astrophotography because it allows relatively short exposures compared with a slower lens at f/5.6 or f/8.
My longer 420–800mm lens operates at f/8 at the shorter end and f/16 at the longer end. That is a considerably slower arrangement than a fast wide-angle lens.
It can still be useful for bright subjects such as the Moon, but photographing faint deep-sky objects with it is more demanding.
This is why it is worth looking at aperture as well as focal length. The longest lens is not necessarily the most suitable lens for the night sky.
Remember the Weight and Stability
One thing that can easily be overlooked when upgrading is the additional weight of a larger lens.
A camera that feels comfortable in your hands with a standard lens may become much less manageable when fitted with a long telephoto lens.
For astrophotography, a sturdy tripod is particularly important. Even a small amount of vibration can spoil a photograph, especially when using a long focal length.
A remote shutter release or the camera’s built-in self-timer can help prevent movement when taking an exposure.
If you intend to photograph faint objects using longer exposures, you may eventually need a star tracker or an equatorial mount. These help compensate for the apparent movement of the stars caused by the Earth’s rotation.
Remember that a tracking mount has a weight limit. Before fitting a heavy lens, check the combined weight of the camera, lens and any accessories.
Sometimes the most useful upgrade is not a lens at all, but a better support system.
What About Your Existing Filters?
If you already use photographic filters, check whether they will fit your new lens.
Many filters screw into a thread at the front of the lens. Different lenses may have different filter-thread diameters, even when they are made by the same manufacturer.
For example, a filter designed for a 58mm thread will not screw directly into a lens with a 67mm thread.
However, you may not need to buy every filter again. Step-up rings can sometimes allow a larger filter to be used on a lens with a smaller thread.
Always check the sizes and whether the arrangement could cause unwanted darkening around the edges of your photographs.
Specialist astronomical filters may have different fitting requirements, so make sure the filter is suitable for both your camera and the type of photography you intend to attempt.
Where Should You Buy a New Lens?
There are plenty of places to look for camera lenses, including specialist photographic shops, established online retailers and reputable second-hand dealers.
My advice is to decide on your budget before you start searching. It is very easy to become attracted to a lens that costs far more than you originally intended to spend.
Buying new has obvious advantages. You should receive a product in unused condition, normally with the manufacturer’s applicable warranty and the retailer’s return arrangements.
However, a good second-hand lens can also represent excellent value, particularly if it has been checked and graded by a reputable photographic dealer.
I would be cautious about unusually cheap lenses offered without a clear description, photographs of their condition or a reasonable return policy.
Before buying, check the seller’s reputation, the precise lens model, its compatibility with your camera and the terms of any warranty or return period.
When paying online, use a secure payment method and understand what buyer protection applies. Do not assume that every payment or private sale is automatically covered.
What Should You Look Out For?
If you are buying a used lens, there are several things worth checking carefully.
Look for scratches or chips on the glass, signs of fungus or haze inside the lens, damage around the mounting ring and problems with the focusing or zoom mechanisms.
A small mark on the outside of a lens does not necessarily make it unusable, but damage to the optical surfaces or internal mechanisms can be much more serious.
Check that the aperture operates correctly and, where applicable, that autofocus and image stabilisation work as expected.
If the lens has been described as faulty or suitable only for parts, make sure you understand exactly what that means.
Repairs can be expensive. A lens that appears to be a bargain may turn out to cost more than buying a better example in the first place.
Whenever possible, buy from somewhere that allows you to inspect or return the lens if it does not meet the advertised condition.
Getting Used to Your New Lens
Once you have your new lens, take some time to become familiar with it before attempting an evening’s astrophotography.
First, learn how to fit and remove it safely. If an adapter is required, make sure you understand how the camera, adapter and lens connect together.
Next, take some photographs during daylight. Try different focal lengths, apertures and focusing methods. Photograph something nearby and then something farther away to see how the results change.
If the lens is heavier than your previous one, practise balancing the camera securely on your tripod.
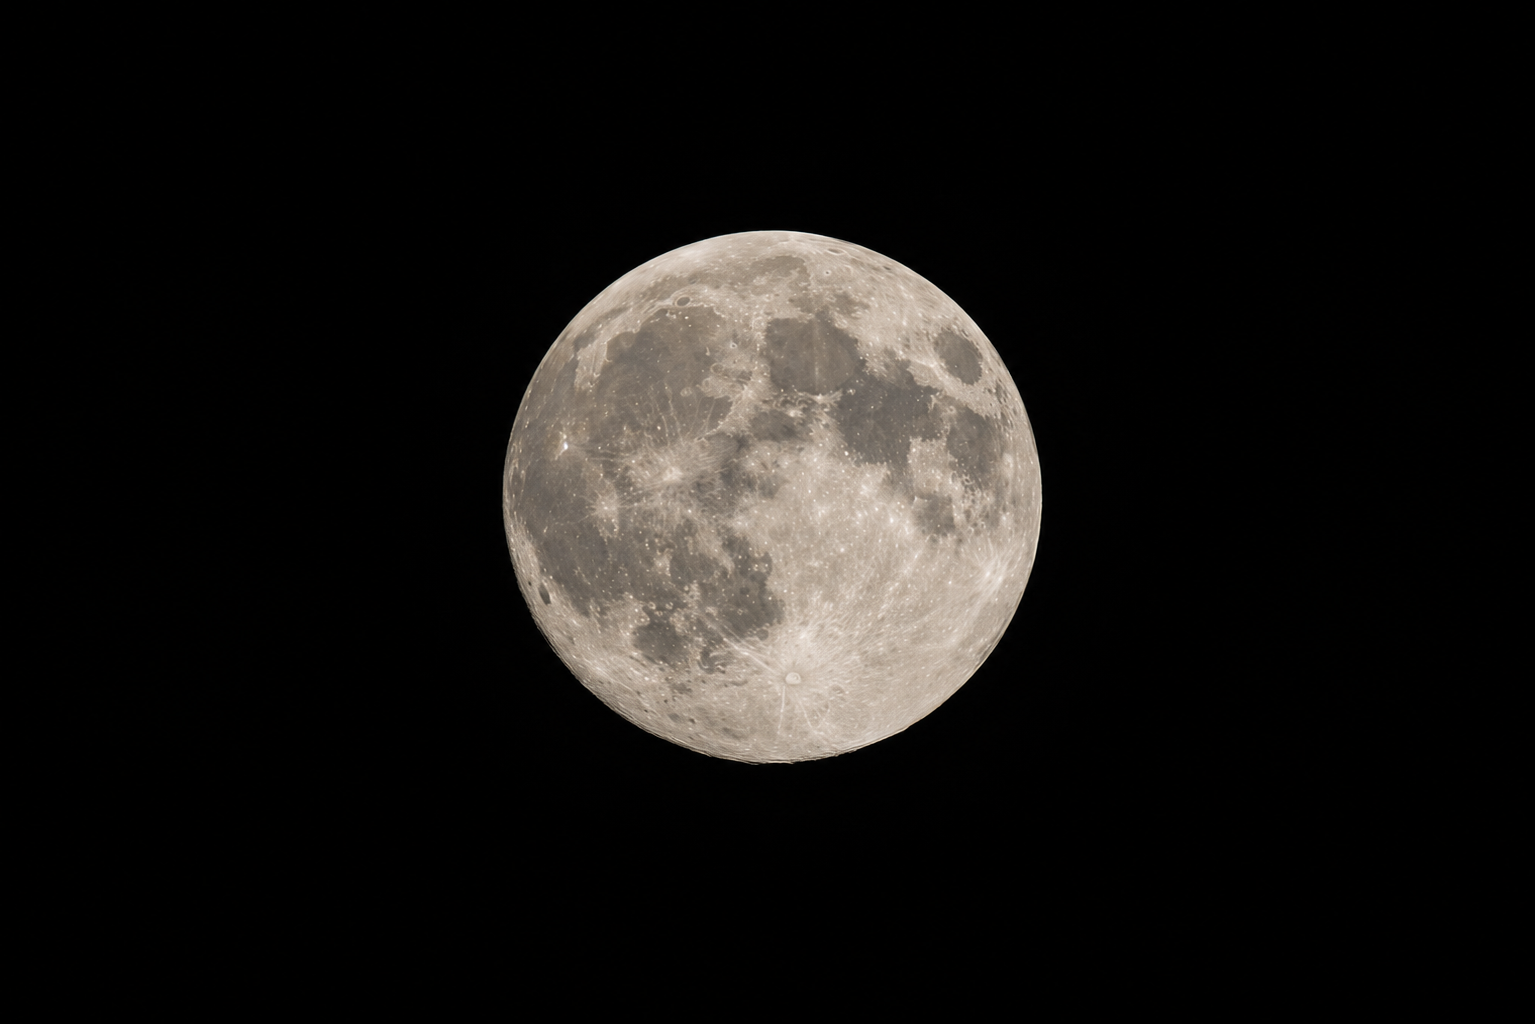
When you are comfortable with the equipment, try photographing the Moon. It is bright, relatively easy to locate and an excellent subject for learning how a longer lens behaves.
Experiment with shutter speeds, ISO settings and focus. Examine your photographs closely to see which settings produce the sharpest results.
Only when you feel confident should you move on to more demanding targets such as star fields or faint deep-sky objects.
When Is an Upgrade Worthwhile?
I believe the best reason to buy another lens is that you have reached a point where your existing equipment is genuinely limiting what you want to achieve.
If your interest is in wide-field views of the night sky, a faster wide-angle lens may be more useful than a large telephoto lens.
If you want to photograph the Moon in greater detail, a longer focal length may be the better choice.
If your main difficulty is blurred photographs, however, the answer might be a better tripod, more careful focusing or improved tracking rather than a new lens.
There is no need to rush into buying expensive equipment simply because other photographers are using it. Learn what your present camera can do, identify its limitations and then make your decision.
Final Thoughts
Upgrading a camera lens can be an exciting step, and it certainly gave me more opportunities to experiment with my own photography.
Starting with a 70–210mm zoom lens and later moving to a much longer 420–800mm lens helped me explore different subjects and discover what suited my interests.
But I would encourage beginners to think carefully before spending money. A new lens should help you achieve something that your existing equipment cannot easily provide.
Check compatibility, understand the relationship between focal length and aperture, allow for the weight of the equipment and buy from a trustworthy supplier.
Above all, practise with what you have. Take photographs during the day, experiment with the Moon and gradually develop your technique.
When you are ready for that next lens, you will have a much better idea of what you need and why.
And then, when the skies are clear, plan your evening, set up your camera and enjoy discovering what your equipment can do.
For more beginner equipment advice, explore our Astrophotography and Mounts and Tracking sections.