Learning how to photograph the Moon is one of the easiest ways to begin astrophotography. You don’t need an expensive astronomical camera or sophisticated tracking equipment to get started. In fact, you may already have everything you need in your pocket.
A modern smartphone can take surprisingly good photographs of the Moon, while a camera and sturdy tripod can take you considerably further. Later, you may decide to attach a camera or smartphone to a telescope.
But before worrying about ISO, shutter speeds or lenses, there is one thing that matters enormously.
Stability Comes First
Taking pictures of stars and planets requires a stable mount. It doesn’t matter how good your camera or phone is: if it moves while the photograph is being taken, you are unlikely to get a sharp image.
This is equally important when photographing the Moon.
The Moon is bright enough for us to use relatively fast shutter speeds, but even a tiny movement can soften an image, particularly when using a long telephoto lens or photographing through a telescope.
Make sure the tripod legs are firmly positioned and avoid extending a lightweight tripod farther than necessary. If it is windy, try to find somewhere sheltered.
And don’t forget one of the most obvious causes of vibration: you.
Pressing the shutter button can move the camera. Use a two-second self-timer, cable release or remote shutter release whenever possible. On a smartphone, the timer performs the same useful job.
Give the equipment a moment to settle and let it take the photograph without touching it.

Using a Mobile Phone
The camera in your mobile phone is very well suited to taking your first pictures of the Moon.
You can simply hold the phone and take a photograph, but you’ll usually get much better results if you keep it steady.
Small tripods are available specifically for smartphones. Put one on a solid surface and it can make a considerable difference. If you plan to take a lot of Moon photographs, I suggest investing in a reasonably firm tripod and a secure smartphone holder.
You don’t need anything elaborate. You simply want something that holds the phone firmly and doesn’t wobble every time you touch it.
Don’t Immediately Use Maximum Zoom
This is one of the easiest traps for a beginner to fall into.
You see a small Moon on the phone screen, so naturally you zoom in as far as the phone will allow.
But much of that extra magnification may be digital zoom rather than true optical magnification. The phone is effectively enlarging and cropping the image, which can make it softer and reveal less detail rather than more.
If your phone has several physical camera lenses, experiment with its optical telephoto setting if available.
Otherwise, don’t worry if the Moon initially looks relatively small. A sharp photograph that can be cropped afterwards is often better than a large, blurred Moon.
Your Phone May Have Manual Camera Controls
Many people don’t realise how much control their phone camera provides.
Depending on the make and model, look in the camera application for something called Pro, Professional, Manual or a similar mode.
On some phones this can be found by selecting More and then Pro.
You may find controls for ISO, shutter speed, focus, white balance and exposure compensation.
Don’t worry if those terms look complicated. You don’t need to master everything at once.
For photographing the Moon, concentrate initially on ISO, shutter speed and focus.
What Is ISO?
ISO controls how strongly the camera amplifies the signal recorded by the sensor.
Increasing the ISO can make the image appear brighter, but higher ISO settings can also introduce more visible noise and reduce image quality.
Because the Moon is surprisingly bright, you often don’t need a very high ISO.
Try starting somewhere around ISO 100–400.
What Shutter Speed Should I Use?
Shutter speed determines how long the camera records light.
Try something around 1/250 to 1/500 second as an initial experiment with a bright Moon.
Don’t treat those numbers as rules.
The phase of the Moon, atmospheric conditions, your phone and its camera will all affect the correct exposure.
Take a photograph and look at it.
If the Moon is a featureless white disc, it is overexposed. Use a faster shutter speed or lower ISO.
If it is too dark, use a slower shutter speed or increase the ISO slightly.
This is one of the best ways to learn astrophotography: take a picture, look at the result, change one setting and try again.
📷 Beginner Smartphone Settings
ISO: 100–400
Shutter speed: approximately 1/250–1/500 sec
Focus: manual/infinity if available, then fine-tune
Timer: 2 seconds
Zoom: avoid excessive digital zoom
Small Changes Can Make a Big Difference
These two photographs of the Moon were taken at the same shutter speed, but with different ISO and aperture settings. They provide a useful example of how changing the amount of light recorded by the camera can alter the final image.
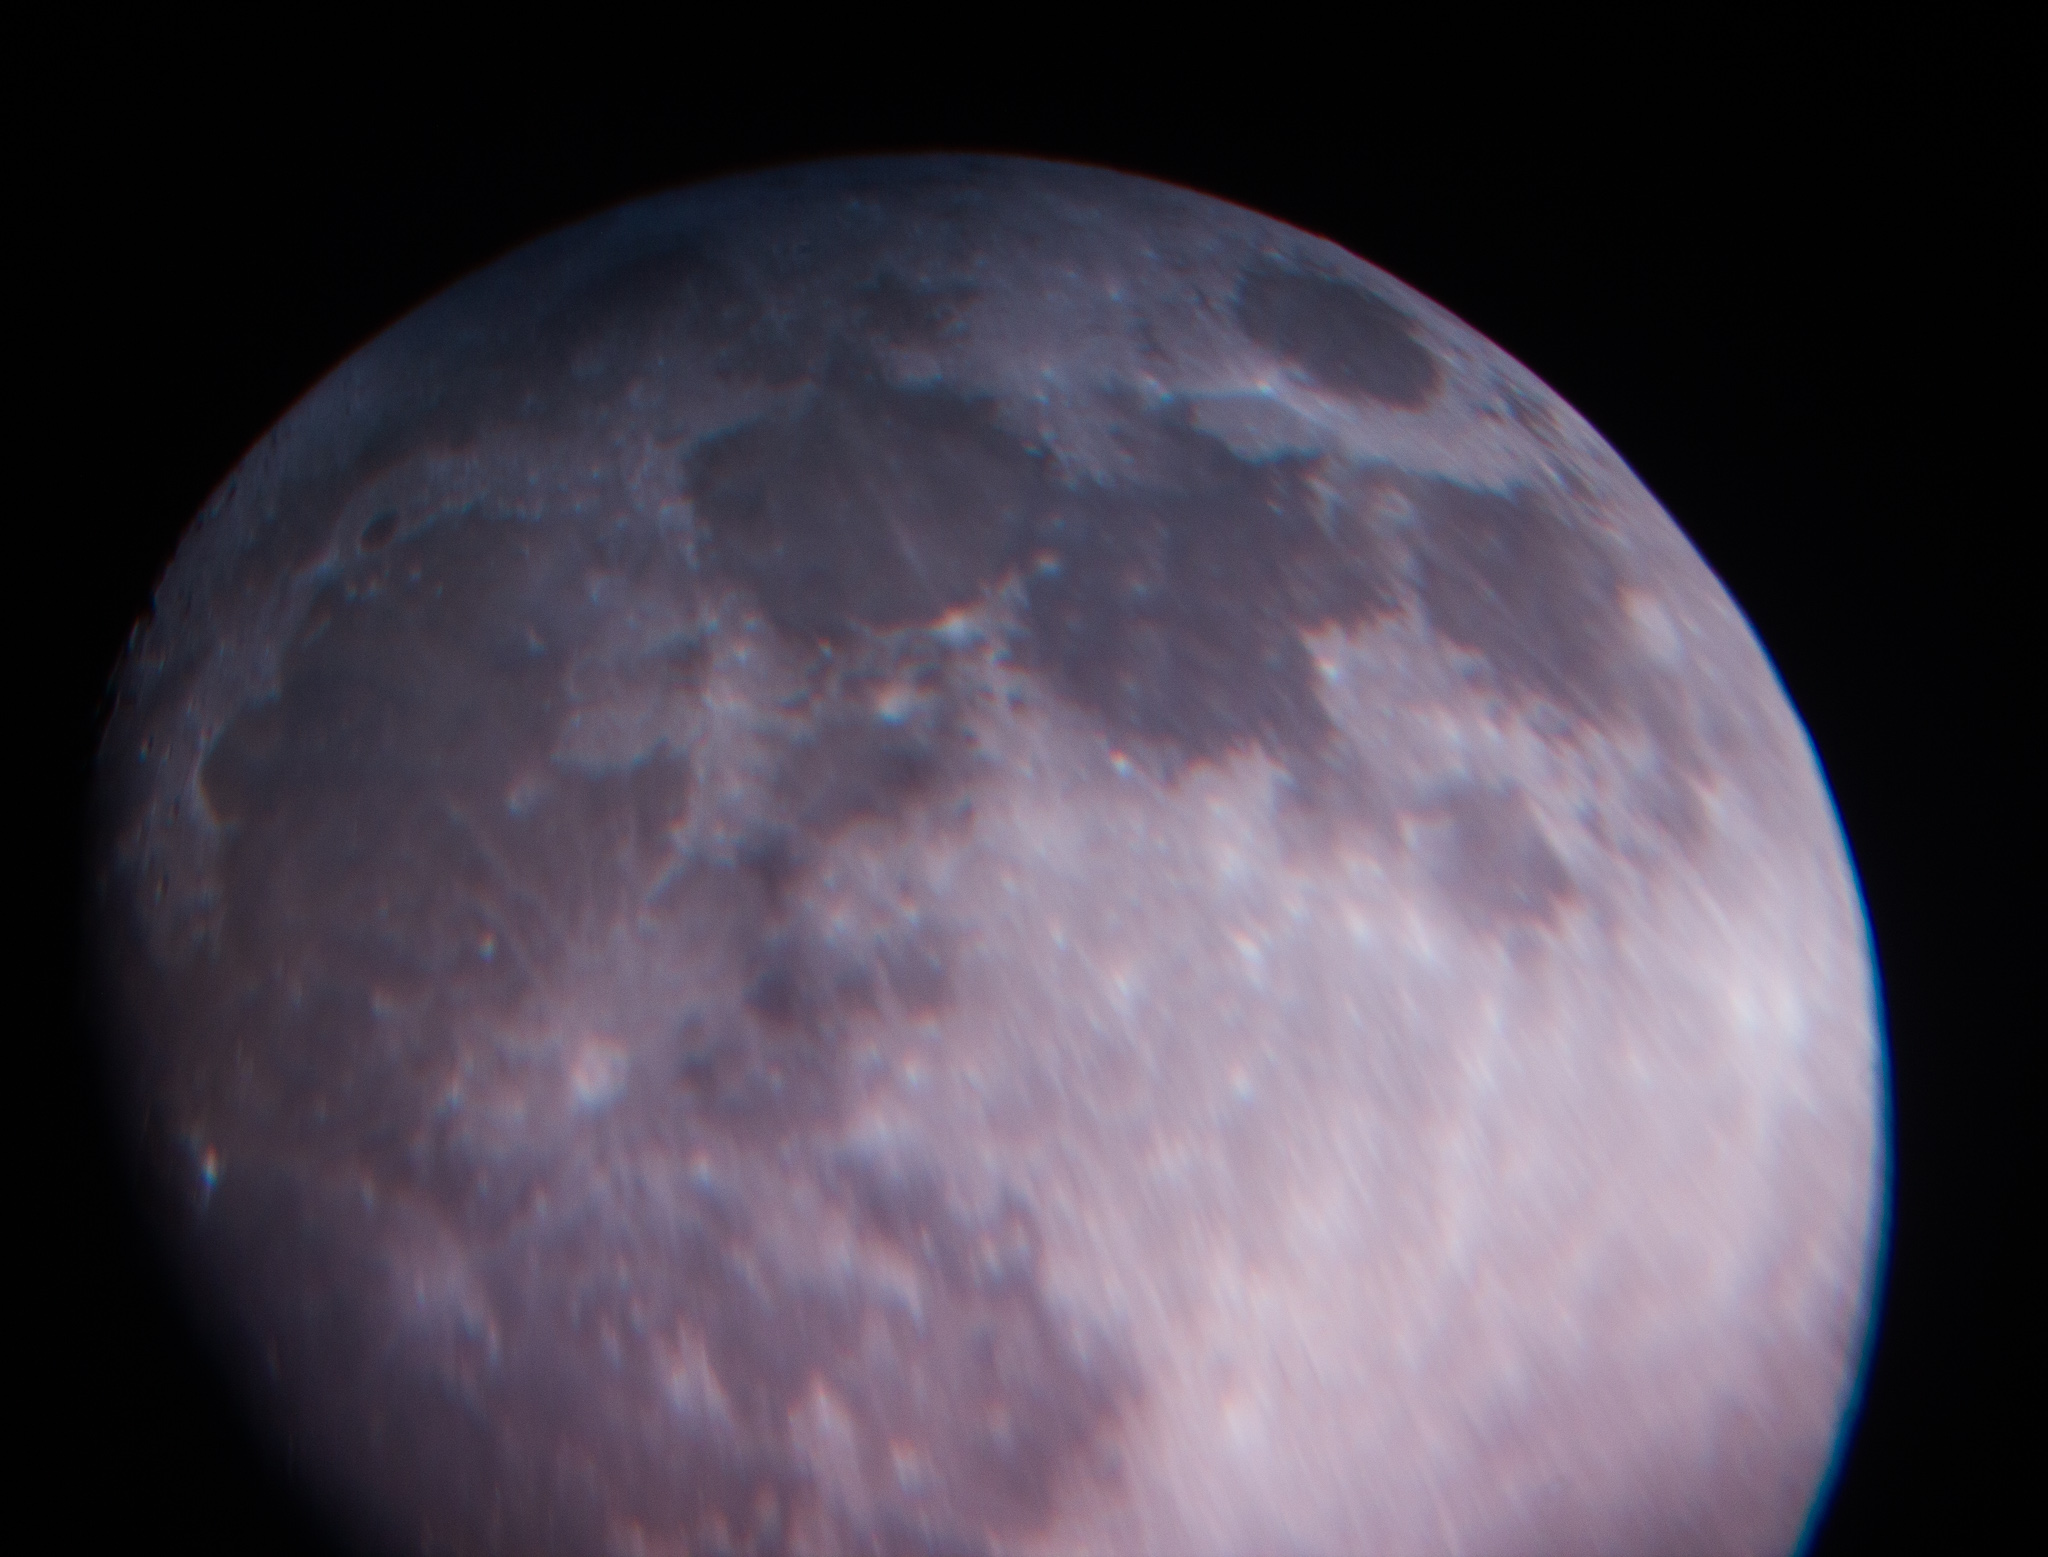
The lower ISO and smaller aperture retain more detail in the brighter parts of the lunar surface.
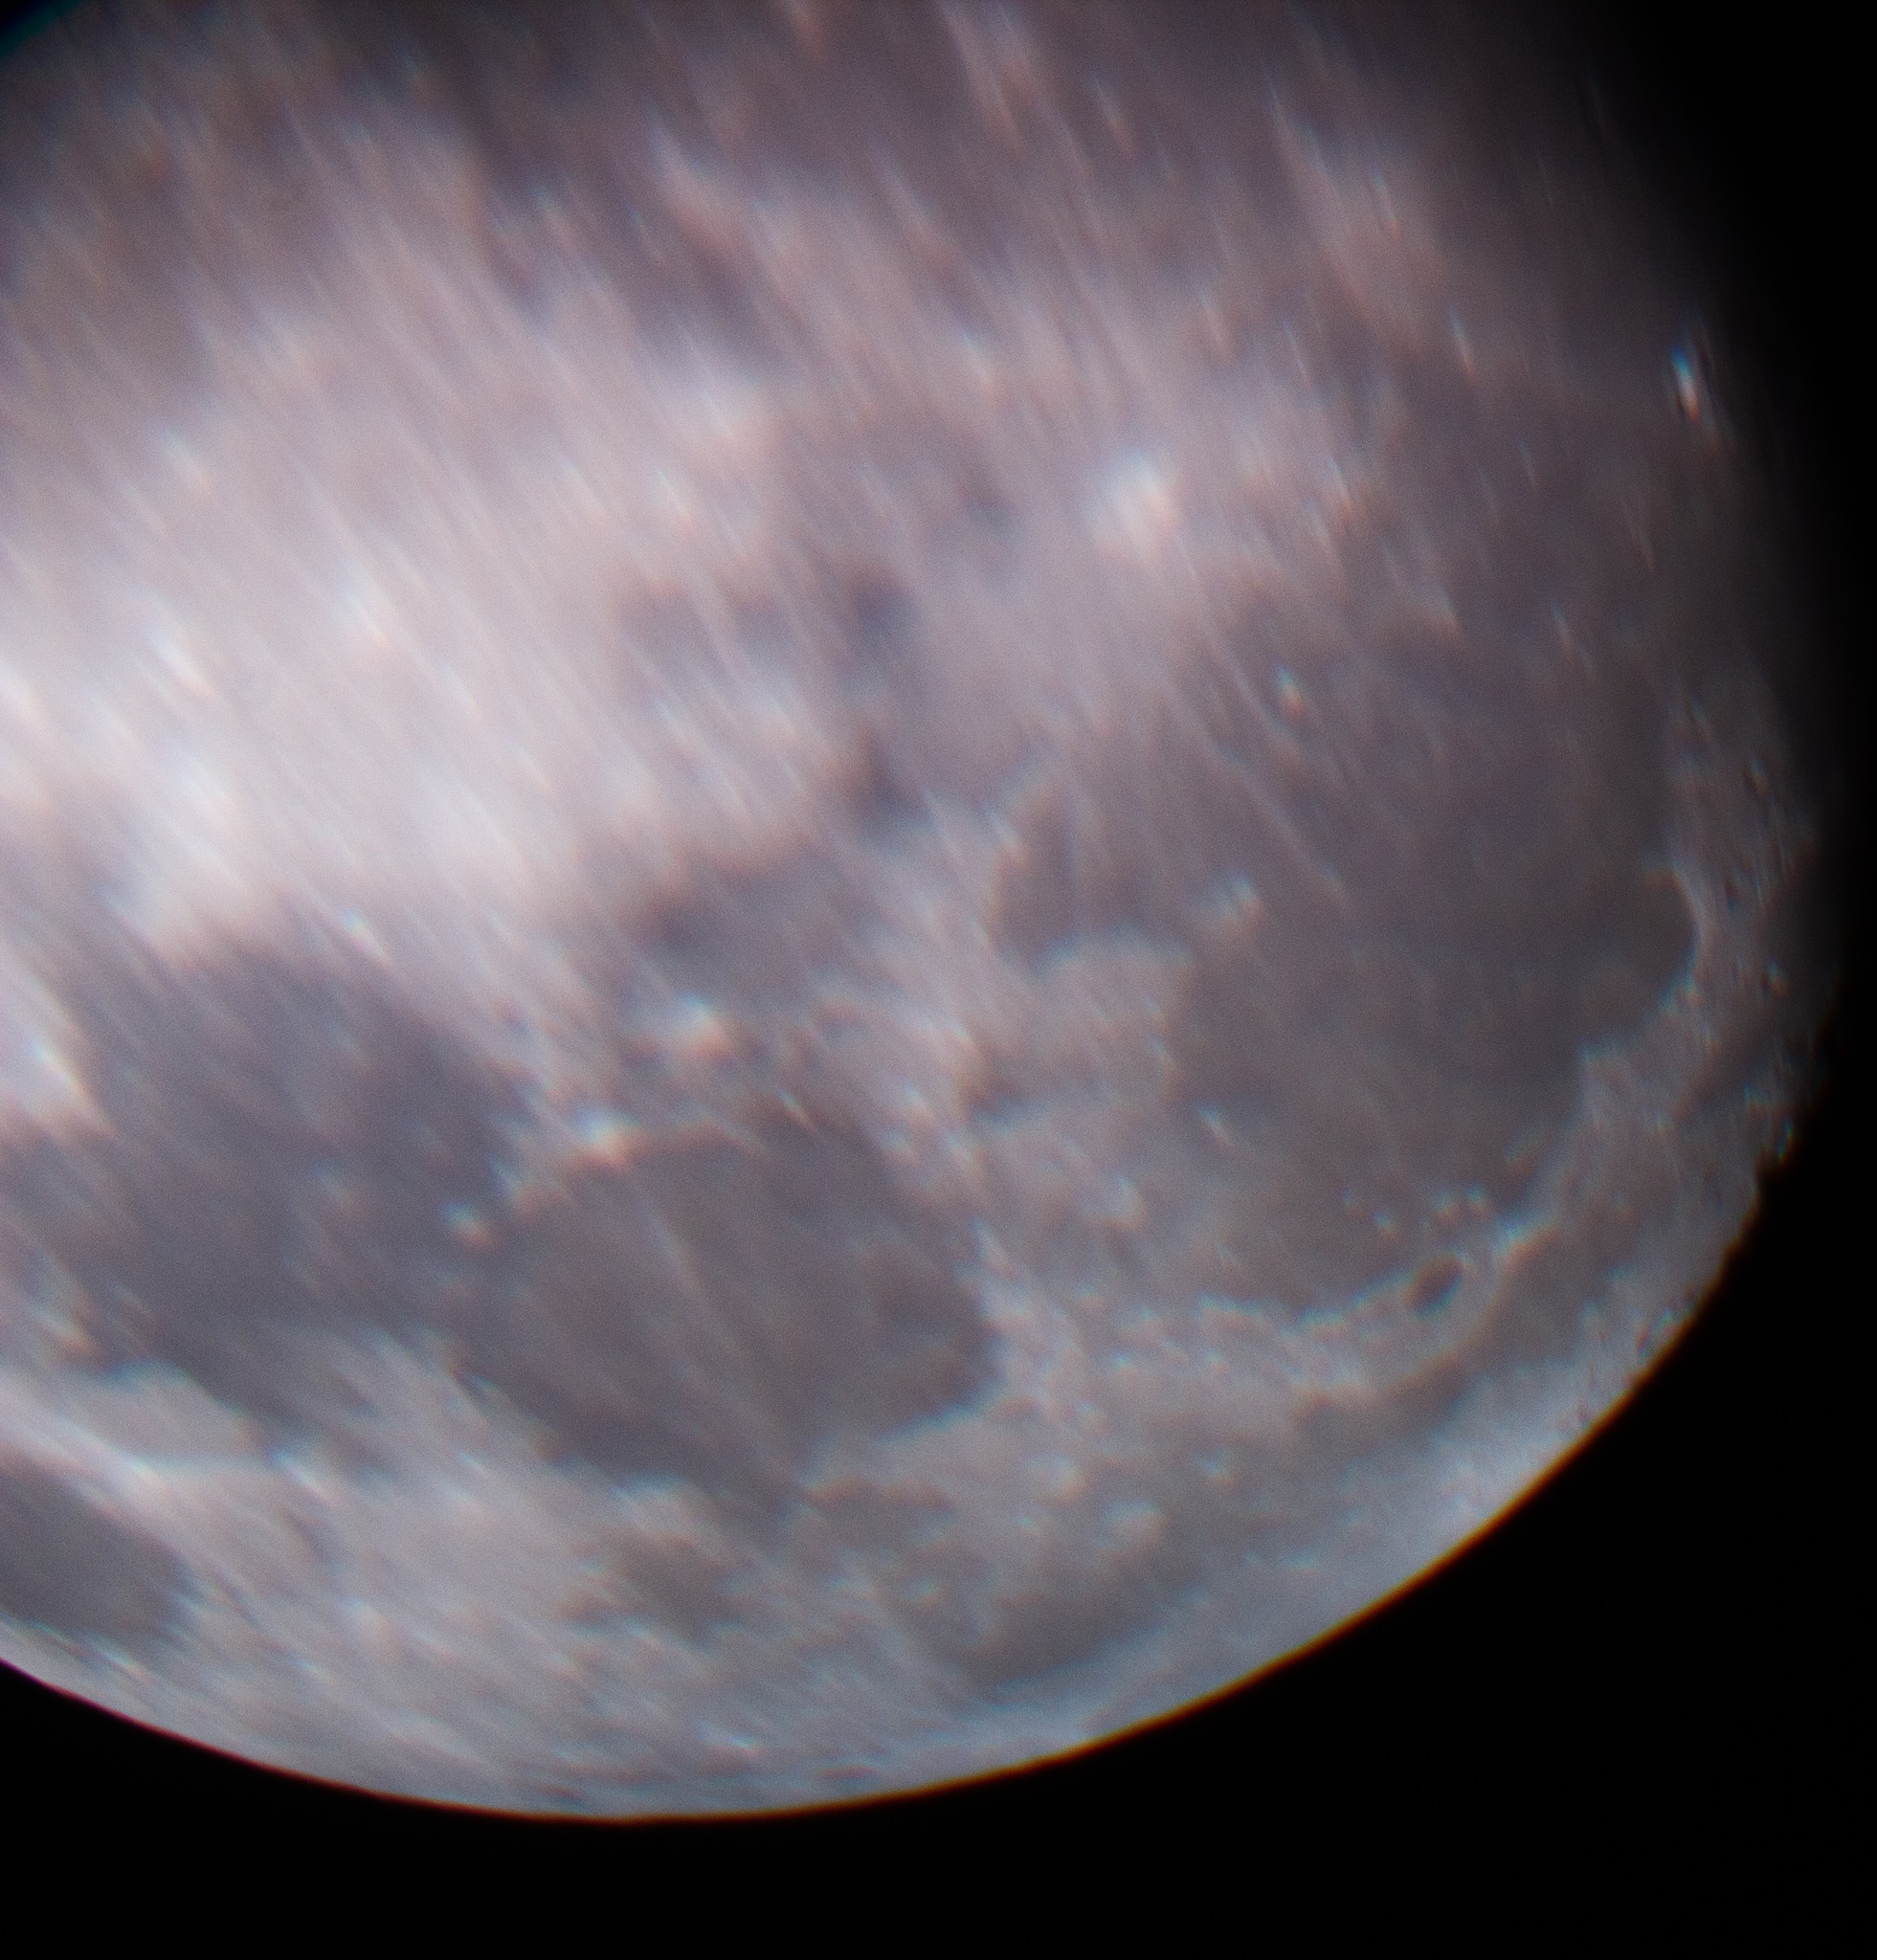
Increasing the ISO and opening the aperture produces a considerably brighter exposure.
What changed? The shutter speed remained at 1/320 second. ISO increased from 200 to 400, which is one stop, while the aperture changed from f/5.6 to f/2.5, allowing considerably more light through the lens. Together, these changes made the second photograph much brighter. A brighter photograph is not necessarily a better one — when photographing the Moon, the aim is to preserve as much surface detail as possible without washing out the highlights.
📷 What is a “stop”?
In photography, a stop is a way of describing a doubling or halving of the amount of light recorded by the camera.
For example, changing from ISO 200 to ISO 400 increases the camera’s sensitivity by one stop. Shutter speed and aperture can also be adjusted in stops, and all three work together to determine the final exposure.
You don’t need to memorise all the numbers when you’re starting. The important thing is to understand the relationship: if you change one setting, you may need to compensate by changing another.
Remember that conditions matter too. Settings that produce a good photograph on one night may not give exactly the same result on another. Thin cloud, haze, atmospheric conditions and the Moon’s altitude can all affect the amount and quality of light reaching the camera.
Use your first photograph as a starting point, check the result and adjust the settings as necessary. Astrophotography is often a process of small adjustments rather than finding one set of settings that works every time.
Focusing on the Moon
Don’t assume autofocus will always get the Moon right.
The camera is looking at a bright object surrounded by a large dark sky, and sometimes it can struggle.
On a smartphone you may be able to tap the Moon on the screen to focus on it. Some phones also allow you to lock the focus and exposure.
In Pro mode you may have manual focus.
Take several photographs and enlarge them on the screen afterwards. Look at the edge of the Moon and the larger craters. If those edges aren’t sharp, adjust the focus and try again.
Using a Camera and Tripod
A DSLR or mirrorless camera gives you considerably more control.
Put the camera on a sturdy tripod and, if you have one, use a telephoto lens. Something around 200mm or longer will make the Moon much more prominent in the frame, although shorter lenses can still produce attractive photographs showing the Moon as part of a landscape.
For a reasonably bright Moon, a useful starting point might be:
ISO: 100–200
Aperture: around f/8
Shutter speed: approximately 1/125–1/250 sec
Again, these aren’t magic numbers.
Take a test shot and examine it. If necessary, change the shutter speed, aperture or ISO until you can see detail in the lunar surface without the brighter areas becoming completely white.
If your camera can record RAW files, use RAW as well as, or instead of, JPEG. RAW files retain more information and give you greater freedom when you eventually start processing your photographs.
But if you’re completely new to photography, don’t let RAW processing become another obstacle. A good JPEG photograph of the Moon is still a good photograph.
When Exposure Goes Wrong
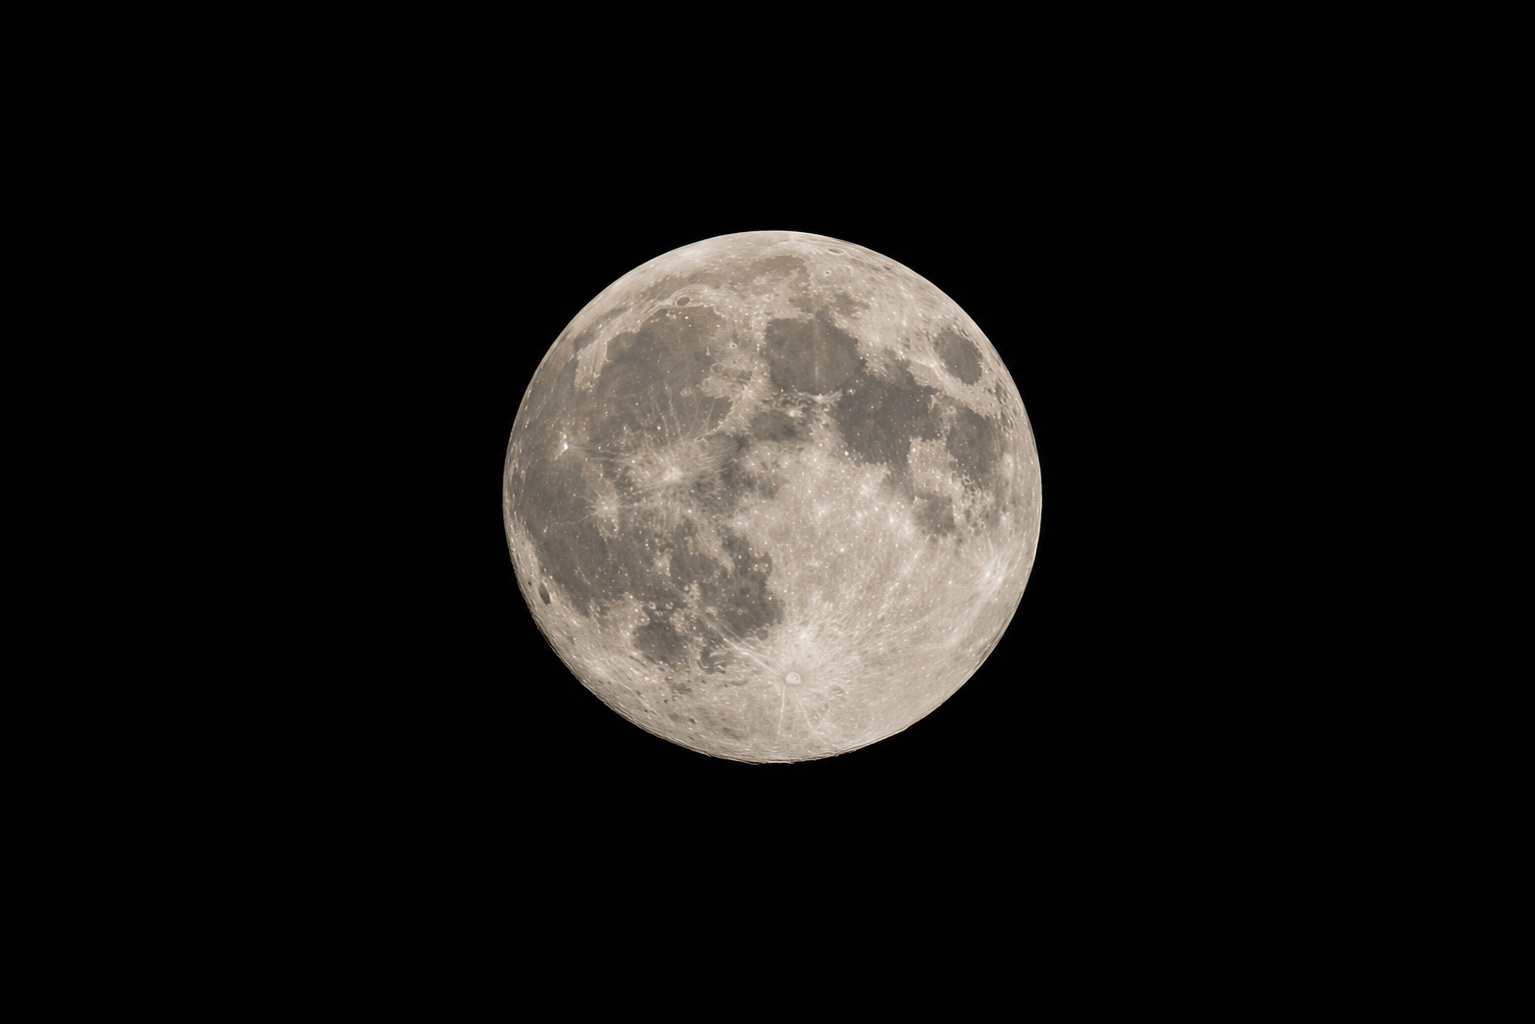
Getting the exposure right is one of the most important parts of photographing the Moon. Fortunately, a badly exposed photograph can also teach you a great deal.
The two photographs below show opposite exposure problems. One has recorded far too much light, while the other has recorded too little.
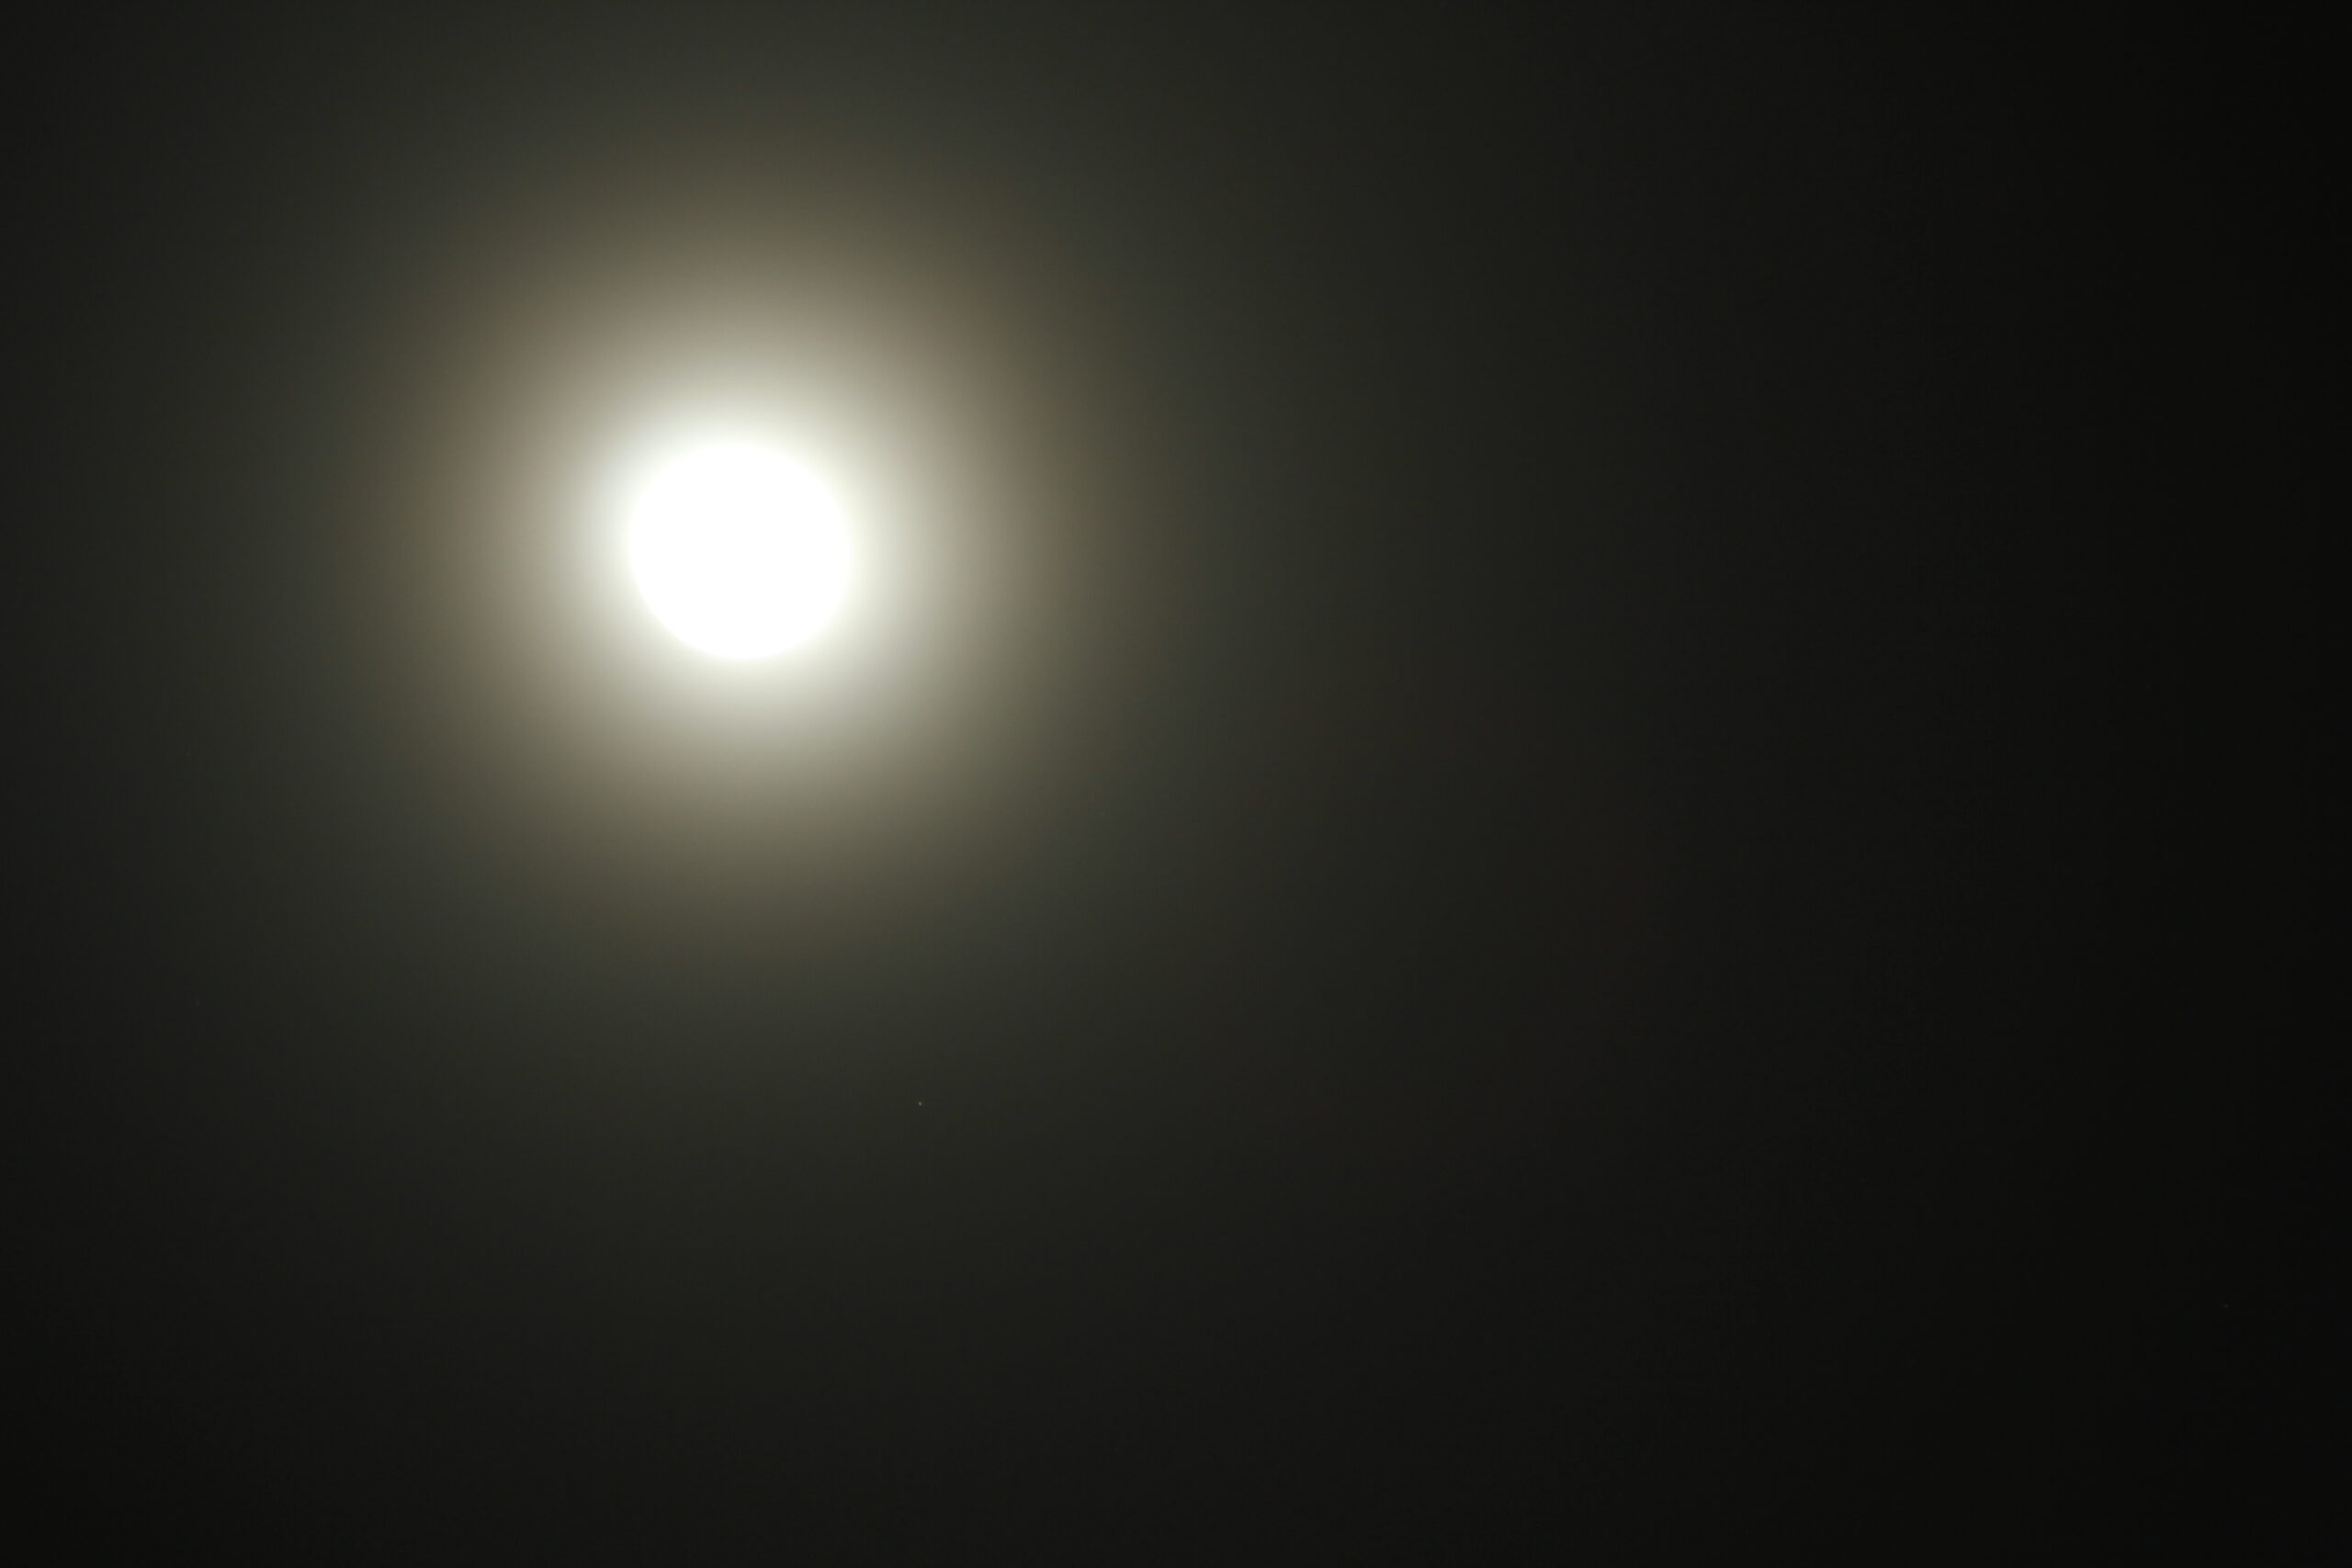
The Moon has become an almost featureless bright disc because too much light has been recorded by the camera.
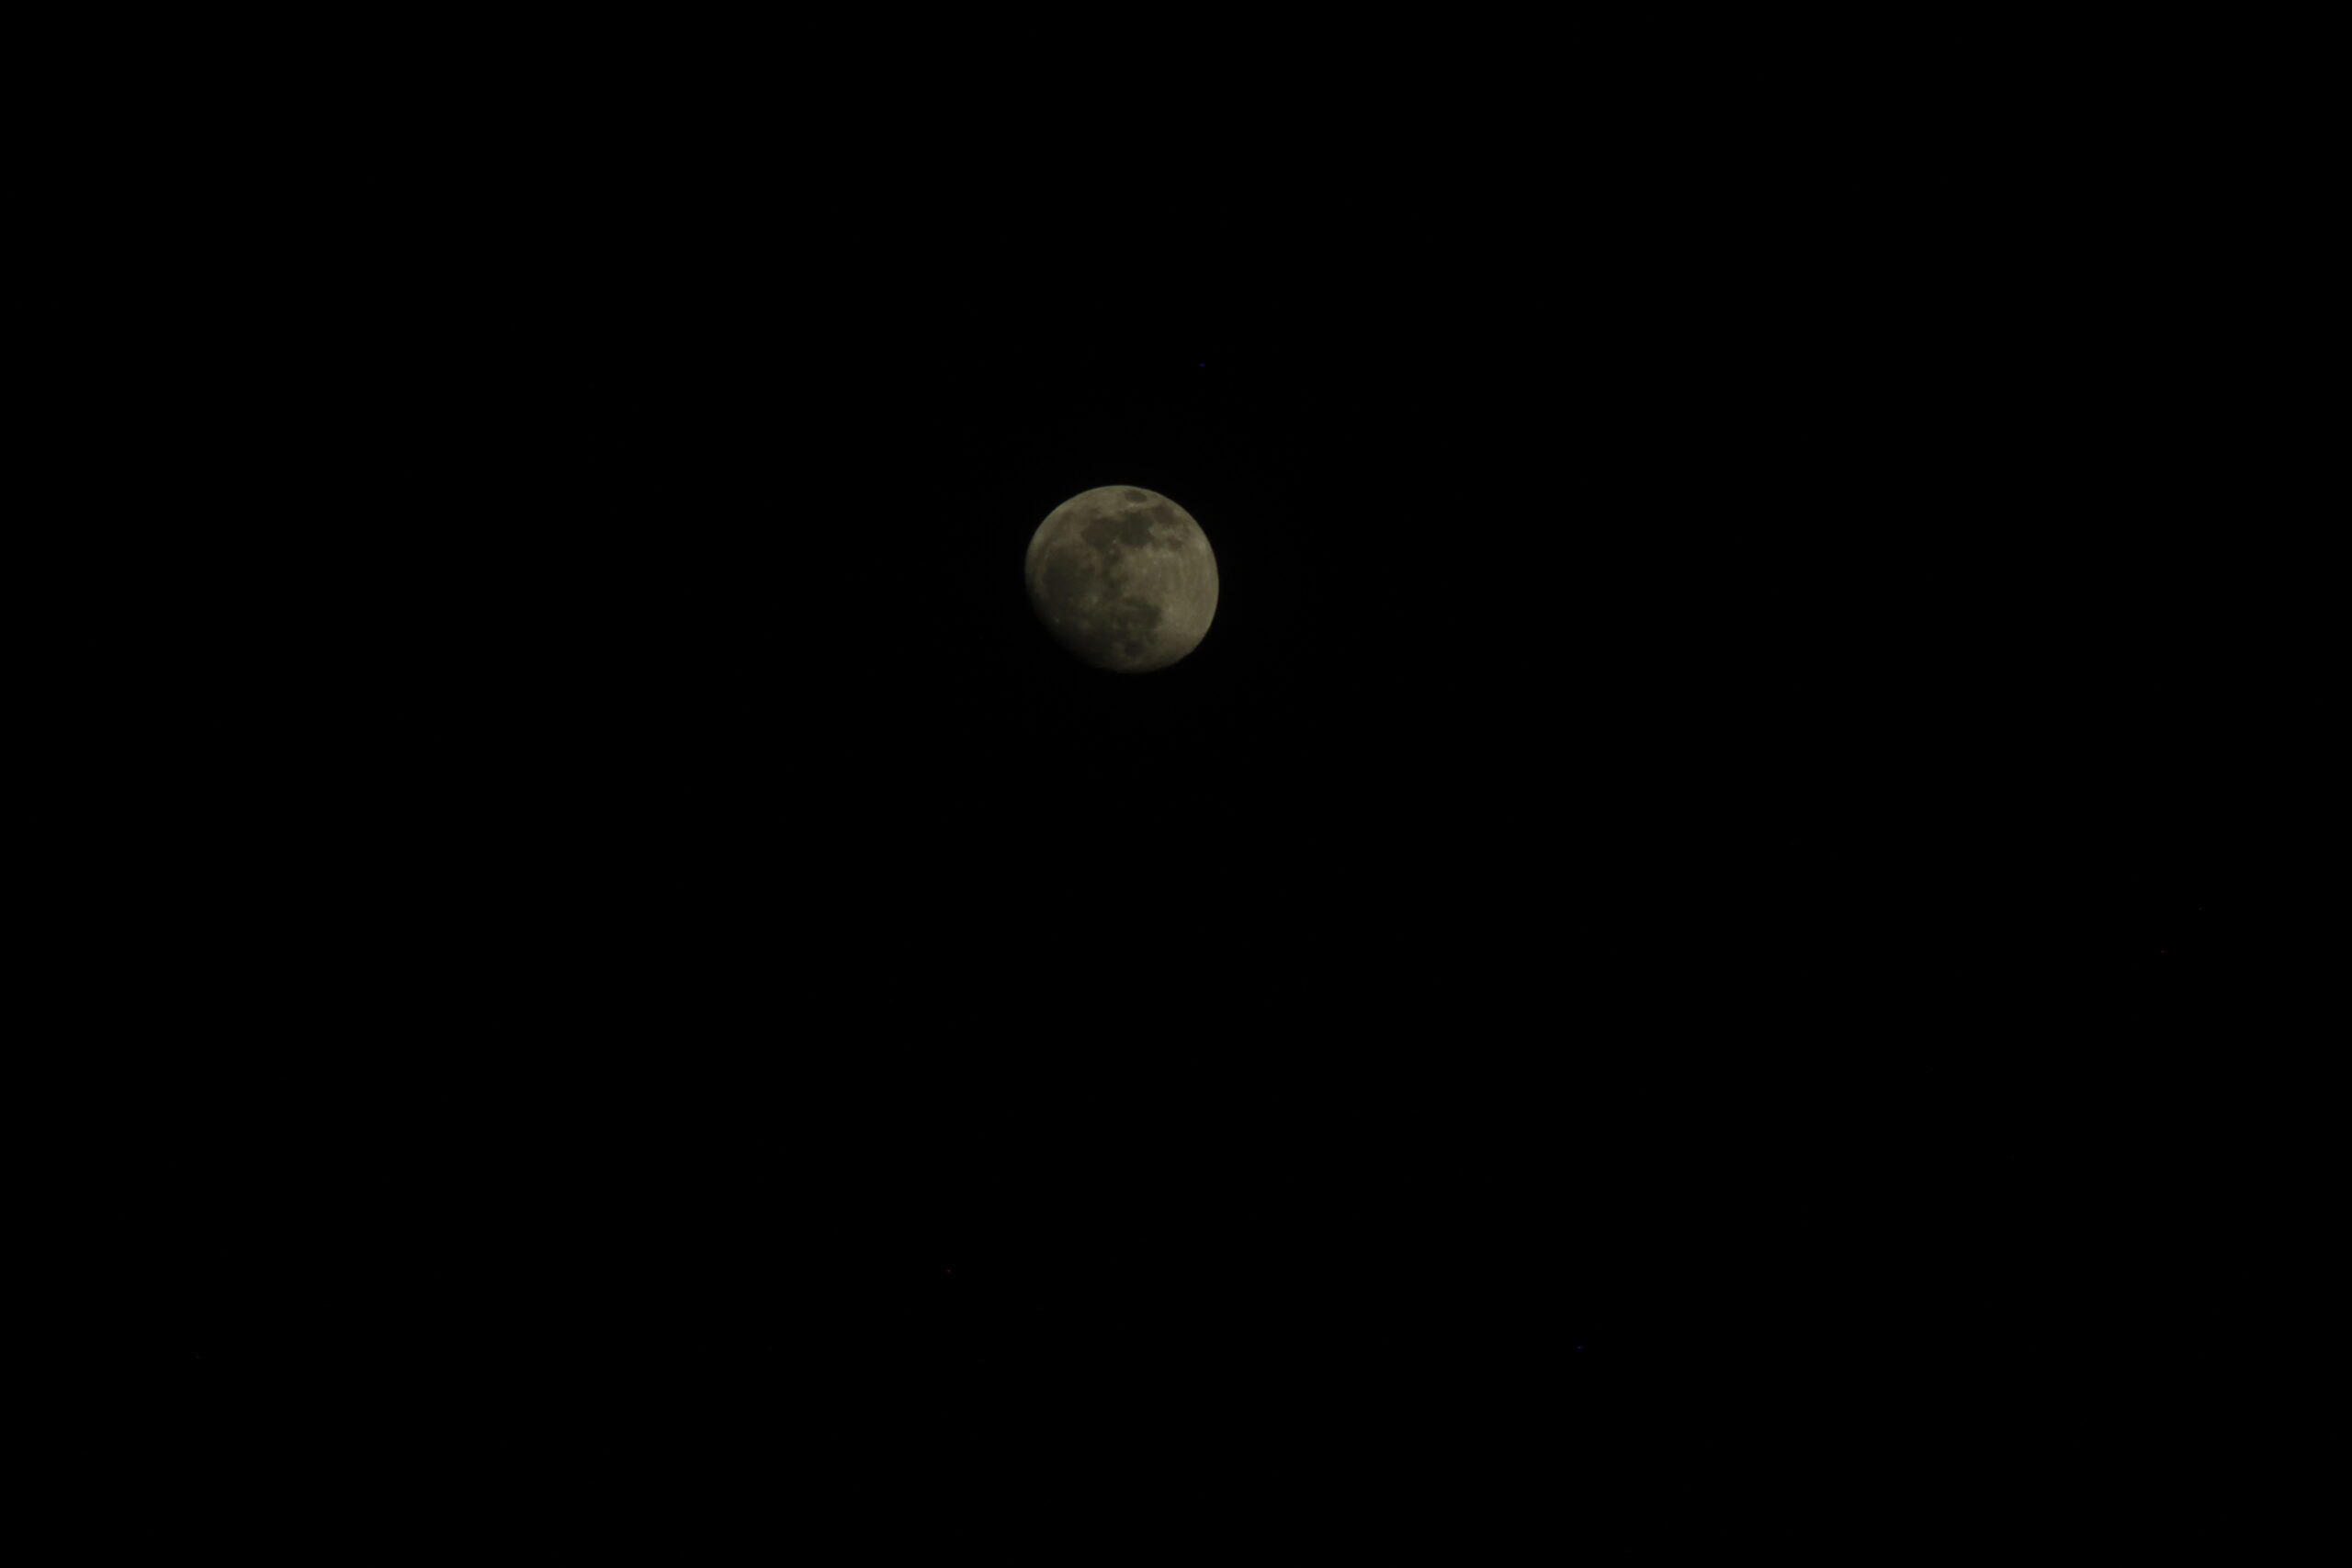
The Moon remains reasonably sharp, but the exposure is too dark to show the lunar surface at its best.
📷 Correcting the Exposure
If the Moon is too bright: try a lower ISO, a faster shutter speed or a smaller aperture (a larger f-number).
If the Moon is too dark: try a higher ISO, a slower shutter speed or a wider aperture (a smaller f-number).
Don’t be disappointed when an exposure goes wrong. Compare the result with your previous photograph, change one setting and try again. Understanding what went wrong is one of the quickest ways to learn how ISO, shutter speed and aperture work together.
Take Plenty of Pictures
This is important.
Don’t take one photograph, look at the camera and decide you’re finished. Take lots.
Our atmosphere is constantly moving. Even on an apparently clear night, atmospheric turbulence can momentarily soften the image.
You may take several photographs using exactly the same settings and discover that one is noticeably sharper than the others.
Digital photographs cost nothing to take, so make use of that advantage.
Photographing Through a Telescope
Once you’re comfortable using a smartphone or camera on a tripod, you may want to try photographing the Moon through a telescope.
There are two common approaches for beginners.
One is to attach a DSLR or mirrorless camera directly to the telescope so that the telescope effectively becomes the camera lens. This is known as prime-focus photography.
The other is to use a smartphone at the telescope eyepiece. Many telescopes now come with smartphone adapters, and separate adapters are readily available.
The smartphone method is often the easiest introduction.
If you’re considering your first telescope, you can also visit our telescope section to see the different types available and which may suit a beginner.
Balance the Telescope
Adding a camera, phone or adapter changes the balance of your telescope.
This matters.
A camera hanging from the focuser can place considerably more weight on one end of the telescope than it normally carries.
Make sure the telescope and mount are properly balanced and that everything is securely attached before you begin imaging.
Even very small movements can blur the image, and the higher the magnification, the more obvious those movements become.
After touching the telescope or focuser, give the equipment time to settle before taking another photograph.
You can learn more about telescope support and tracking equipment in our Mounts and Tracking section.
A Word About Reflector Telescopes
Some beginners discover something frustrating when they attach a DSLR camera to a Newtonian reflector:
They can’t bring the image into focus.
This doesn’t necessarily mean there’s anything wrong with the camera or telescope.
Some Newtonian telescopes designed primarily for visual observing don’t provide enough inward focuser travel for a DSLR sensor to reach the telescope’s focal plane.
There are ways of dealing with this, depending on the telescope, but that’s beyond what we need for a first attempt at lunar photography.
If you’re new to astrophotography and encounter this problem, don’t start modifying your telescope.
We will cover telescope astrophotography and achieving correct focus in greater detail in a later article.
You Don’t Need Tracking for Your First Moon Photograph
This is another advantage of starting with the Moon.
For simple photographs using a camera and tripod, you don’t need an equatorial tracking mount.
The Moon is bright enough that we can usually use relatively fast shutter speeds.
Through a telescope, however, the Moon will gradually move across the field of view because of Earth’s rotation. At higher magnifications this becomes much more noticeable.
A tracking mount makes things easier, but it isn’t necessary for your first attempts.
Can a Moon Filter Help?
A Moon filter can be useful for visual observing because it reduces the brightness reaching your eye.
For photography, however, don’t assume a Moon filter is automatically required. The camera exposure can normally be controlled using ISO, shutter speed and aperture.
If you already use a filter as part of your particular imaging setup, experiment with and without it and compare the results.
Our Moon Filters section explains the types available and how they are normally used.
Simple Processing
Once you’ve taken your photographs, don’t be afraid to make a few adjustments.
Cropping can make the Moon larger in the final image. Small adjustments to brightness, contrast and sharpness can also reveal detail.
But don’t overdo it.
Heavy sharpening can create unnatural edges around craters, while excessive contrast can destroy subtle detail.
The objective isn’t to make the Moon look spectacular at any cost.
Try to bring out the detail that was already captured by the camera.
Later in our astrophotography series we’ll look at more advanced techniques, including stacking multiple images, which can improve detail and reduce noise.
For now, concentrate on producing one good, sharp exposure.
Learn by Experimenting
Perhaps the most important thing I can tell somebody starting lunar astrophotography is:
Experiment.
Change the ISO.
Change the shutter speed.
Try autofocus and manual focus.
Take the same photograph several times.
Then compare them.
Make a note of the settings used for your best photographs. You’ll gradually discover what works with your camera, your phone and your equipment.
And don’t be discouraged by blurred or badly exposed photographs. They’re part of learning.
The Moon gives us another opportunity every month, and as its phase changes you’ll discover that different lighting reveals completely different features.
Start simply.
Use the equipment you already have.
And when you capture your first photograph showing real craters and detail on another world, you’ll understand why lunar photography can become so addictive.
Clear skies.