The Moon: The Perfect Place to Begin
Moon observing for beginners is one of the easiest and most rewarding ways to begin exploring the night sky. The Moon is bright, easy to locate and filled with detail that can be seen using nothing more than your eyes, a pair of binoculars or a small telescope.
Unlike many faint galaxies and nebulae, the Moon can be observed successfully from towns and cities. Light pollution has relatively little effect on it, and you do not need expensive equipment or perfectly dark skies to enjoy the view.
It is also an object that continually changes. As sunlight moves across the lunar surface during the month, craters, mountains and broad dark plains appear under different lighting conditions. A feature that seems flat and unremarkable one night may look dramatic a few evenings later as long shadows reveal its true shape.
Why the Moon Is the Perfect First Target
Many beginners naturally point their first telescope towards the Moon, and there are several good reasons for doing so.
- It is easy to find: You do not need advanced knowledge of constellations or star charts to locate it.
- It is bright: The Moon remains clearly visible from light-polluted locations.
- It contains obvious detail: Even modest binoculars can reveal dark maria and some of the larger craters.
- It changes throughout the month: Different phases reveal different areas of the lunar surface.
- It suits almost every instrument: The Moon is rewarding through the naked eye, binoculars and telescopes of nearly every size.
- It helps you practise: Focusing, changing eyepieces and tracking the Moon are valuable skills for later planetary and deep-sky observing.
The Moon is forgiving enough for a first attempt but detailed enough to remain fascinating after many years of observing. Even experienced astronomers return to it because changing sunlight constantly creates new views.
Observing the Moon with the Naked Eye
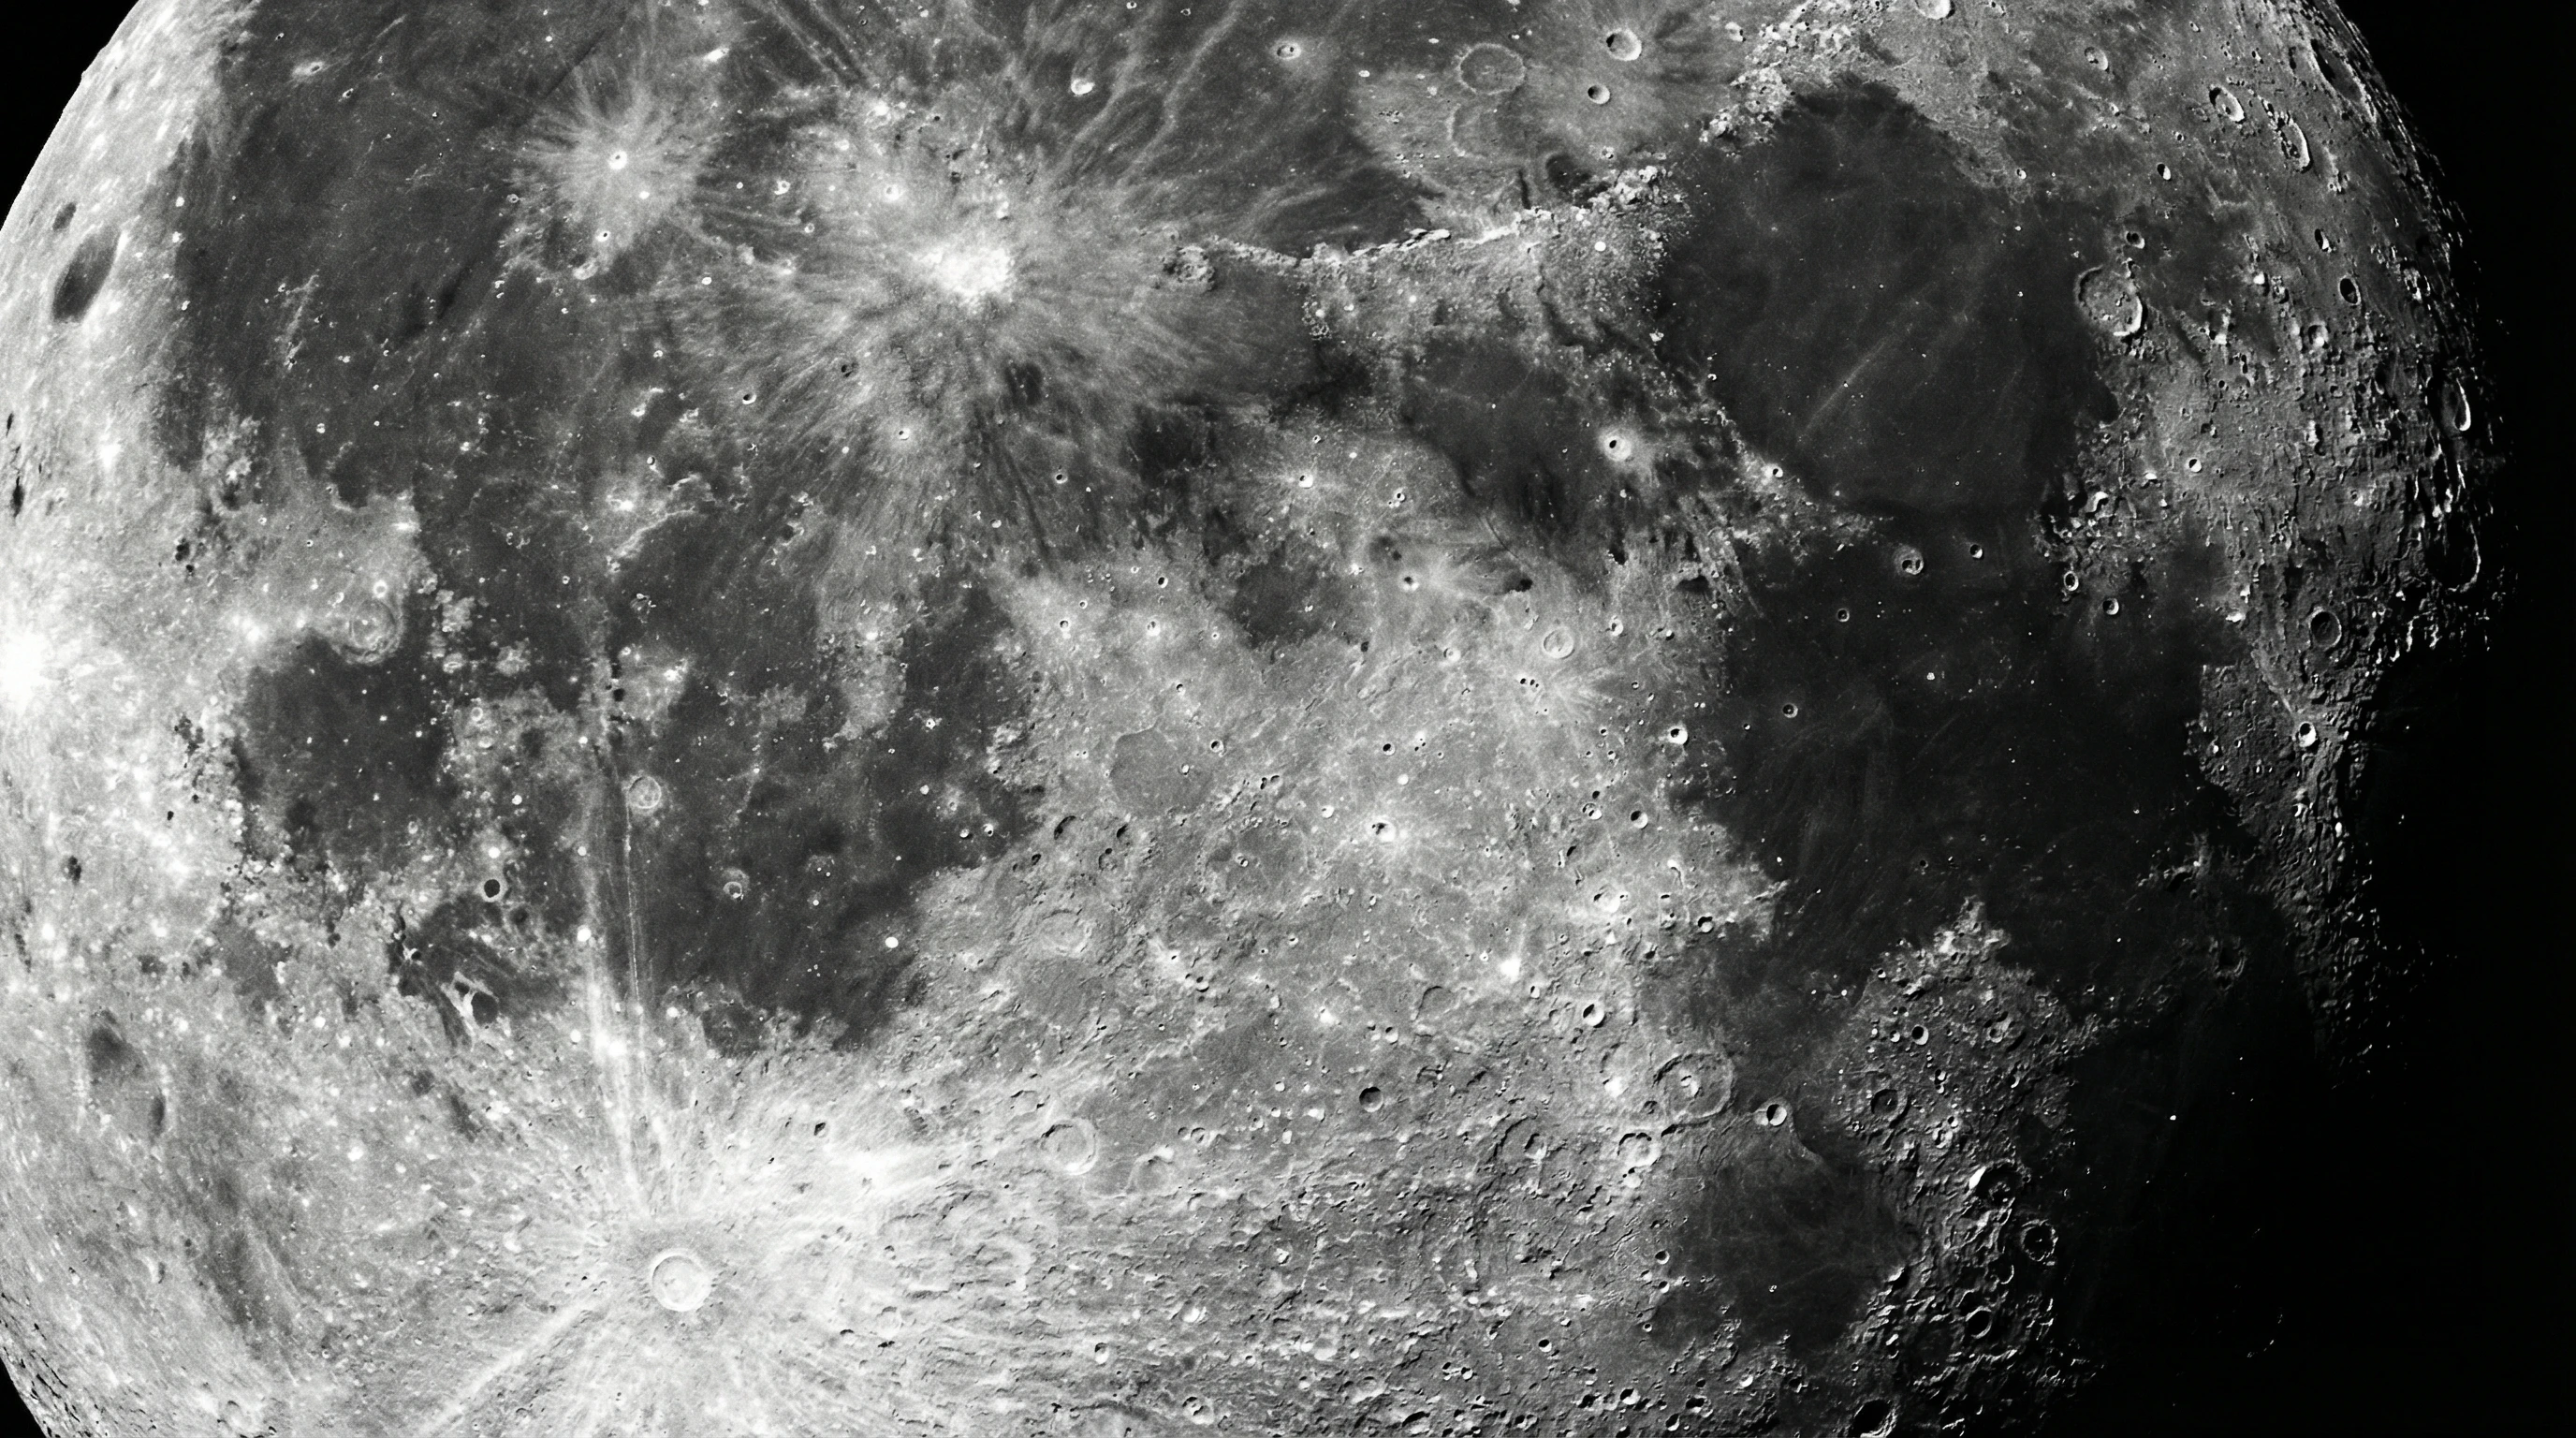
You can begin exploring the Moon without any equipment. The dark areas visible across its face are the lunar maria, enormous plains formed when ancient lava flooded large impact basins.
The brighter regions are mainly rugged highlands covered in countless craters. The contrast between these bright and dark areas produces the familiar patterns that people have imagined as the “Man in the Moon” and many other figures throughout history.
Watching the Moon over several evenings also helps you understand its phases. Notice how the illuminated portion grows from a thin crescent towards First Quarter, becomes gibbous and eventually reaches Full Moon. Afterward, the process reverses as the illuminated area gradually decreases.
You may also notice that the Moon does not rise at the same time every day. On average, it rises roughly fifty minutes later each night, although the precise change varies.
Observing the Moon with Binoculars
A pair of binoculars provides a major step beyond naked-eye observing. Standard 7×50 or 10×50 binoculars can reveal the larger craters, the outlines of the maria and the uneven boundary between the illuminated and dark portions of the Moon.
Binoculars are especially useful for beginners because they are quick to set up and show the Moon in a natural, wide field of view. They are also easier to aim than many telescopes.
Hold the binoculars steadily with both hands and rest your elbows against your body. For a more stable image, sit in a chair, lean against a wall or mount the binoculars on a tripod using a suitable adapter.
Look for the broad circular outline of Mare Imbrium, the isolated oval of Mare Crisium and the darker connected plains of Mare Serenitatis and Mare Tranquillitatis. Around First Quarter, several large craters become especially noticeable near the line dividing lunar day from lunar night.
Observing the Moon Through a Telescope
Almost any properly functioning telescope can provide impressive lunar views. A small refractor can reveal sharp crater detail, while a reflector or larger telescope can show smaller features and finer structure when atmospheric conditions are steady.
Begin with your lowest-powered eyepiece. This gives the widest field of view, making the Moon easier to locate and keep centred. Once the image is sharp, try a medium-powered eyepiece to examine individual areas more closely.
Avoid beginning with the highest magnification available. Excessive magnification can make the image dim, unsteady and difficult to focus. The most useful power depends on your telescope, the atmosphere and the Moon’s height above the horizon.
Do not be surprised if the view through your telescope appears upside down or reversed. Many astronomical telescopes change the orientation of the image. This does not affect observing, although you may need to rotate or mentally reverse a lunar map.
Which Moon Phase Is Best for Observing?
Many people assume that Full Moon is the best time to observe, but it is often one of the least rewarding phases for seeing surface relief.
At Full Moon, sunlight falls almost directly onto the side facing Earth. With fewer long shadows, many craters and mountains appear flatter than they do at other times. The Moon is also extremely bright, which can make extended viewing uncomfortable.
Waxing Crescent
A waxing crescent Moon appears in the western sky after sunset. This is an excellent phase for observing because the low angle of sunlight creates strong shadows along the illuminated edge.
First Quarter
At First Quarter, half of the Moon’s visible face is illuminated. It is well placed in the evening sky and offers a dramatic view of craters and mountains along the dividing line.
Waxing Gibbous
During the waxing-gibbous phase, additional features become visible each evening. This is a good time to examine prominent craters such as Copernicus and Tycho and the mountain ranges surrounding Mare Imbrium.
Waning Phases
After Full Moon, the direction of the lighting changes. Familiar features are illuminated from the opposite side, creating views that can look surprisingly different. The drawback is that the waning Moon is generally visible later at night or before sunrise.
The Importance of the Terminator
The terminator is the boundary between the illuminated and unilluminated parts of the Moon. It is one of the most useful areas for lunar observing.
Near the terminator, the Sun is low in the lunar sky. Mountains and crater walls cast long shadows, making their shapes and heights much easier to appreciate.
As the terminator moves across the surface from one night to the next, new features emerge into sunlight. Watching the same region on consecutive evenings is one of the best ways to understand how strongly lighting affects what you can see.
Beginner’s tip: Instead of trying to examine the whole Moon at once, choose one small area close to the terminator and spend several minutes studying it carefully.
Preparing for Your First Lunar Observing Session
You do not need a complicated setup. A comfortable and successful first session can be organised with only a few items.
- Your binoculars or telescope.
- A low- and medium-powered eyepiece if using a telescope.
- A chair or adjustable observing stool.
- A lunar map, book or suitable Moon application.
- A notebook and pencil for recording what you see.
- Warm clothing, even during apparently mild evenings.
- A small red torch if you need to read charts or notes.
Set up before it becomes completely dark, particularly if you are still learning how your telescope fits together. Make sure the tripod or mount is stable and place the instrument where you have a clear view of the Moon.
Start at low magnification, bring the edge of the Moon into focus and then slowly move across the surface. Take your time. The longer you look, the more detail you are likely to notice.
Your First Moon Challenge
Try observing the Moon on three different evenings during the same lunar cycle:
- Observe it as a thin waxing crescent.
- Return around First Quarter.
- Observe again during the waxing-gibbous phase.
On each evening, sketch the illuminated shape and note any craters or dark plains you recognise. Pay particular attention to the changing shadows along the terminator.
You do not need artistic skill. A simple sketch and a few written observations will help train your eye and create a useful record of how the Moon changes throughout the month.
What to Look for on the Moon
The Moon contains far more detail than most beginners expect. Its surface is covered with craters, broad volcanic plains, mountain ranges, valleys and ridges.
You do not need to identify everything during your first session. Begin with a few large, unmistakable features and gradually add more as your confidence grows.
The appearance of each feature changes with the lunar phase. Some are easiest to find near the terminator, while others become more obvious when the Moon is almost full.
The Lunar Maria
The broad dark areas visible on the Moon are called maria, the Latin word for seas. Early observers believed these smooth-looking regions might contain water.
They are actually enormous plains of dark volcanic rock. Billions of years ago, large impacts created deep basins in the lunar crust. Lava later flowed into many of these basins and cooled to form the darker surfaces we see today.
Mare Tranquillitatis
Mare Tranquillitatis, the Sea of Tranquillity, is one of the most famous areas on the Moon because Apollo 11 landed near its south-western edge in July 1969.
It appears as a broad dark plain on the eastern side of the Moon’s visible face. Through binoculars, it blends into neighbouring maria, while a telescope reveals smaller craters and ridges across the area.
Mare Serenitatis
Mare Serenitatis, the Sea of Serenity, lies north-west of Mare Tranquillitatis. It is roughly circular and surrounded by brighter highlands.
The boundary between Mare Serenitatis and the surrounding terrain can look particularly impressive when it lies close to the terminator.
Mare Crisium
Mare Crisium, the Sea of Crises, is one of the easiest maria to recognise. It appears as an isolated oval near the eastern edge of the Moon.
Its distinctive shape makes it an excellent starting point when learning to use a lunar map.
Mare Imbrium
Mare Imbrium, the Sea of Showers, is one of the largest impact basins on the visible side of the Moon. It occupies a large part of the Moon’s north-western region.
Mountain ranges form parts of its boundary, and several famous craters lie nearby. The region is especially rewarding around First Quarter and during the waxing-gibbous phase.
Famous Craters for Beginners
Craters are among the most obvious lunar features. Most were formed when asteroids or comets struck the surface at high speed.
Large craters may contain central peaks, terraced walls and smaller impact marks. Their appearance changes dramatically as the angle of sunlight changes.
Tycho
Tycho is one of the most recognisable craters on the Moon. It lies in the southern lunar highlands and is surrounded by a system of bright rays extending across much of the visible surface.
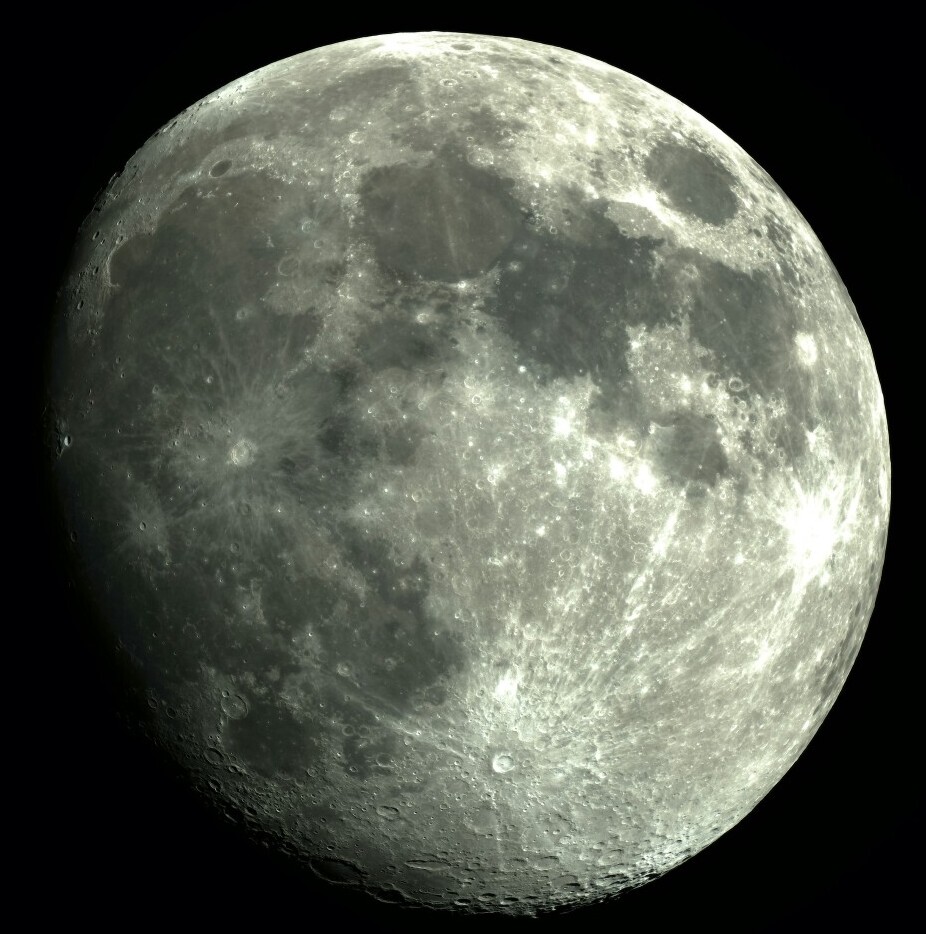
The rays are easiest to see near Full Moon, while the crater walls and central peak are more impressive when the surrounding area is closer to the terminator.
Copernicus
Copernicus lies near the centre of the Moon’s visible face and is another excellent target for beginners.
Through a telescope, it shows steep terraced walls and a group of central mountain peaks. When the Sun is low over the crater, its walls cast dramatic shadows.
Clavius
Clavius is a large ancient crater in the southern highlands. Its most recognisable feature is a curved chain of smaller craters across its floor.
It can be challenging with small binoculars, but it becomes an impressive sight through a modest telescope under steady conditions.
Plato
Plato is a dark-floored crater near the northern edge of Mare Imbrium. Its nearly circular shape and dark interior make it stand out from the surrounding brighter terrain.
Larger telescopes may reveal several tiny craterlets on its floor when the atmosphere is very steady.
Aristoteles and Eudoxus
These two prominent craters lie close together near the northern edge of Mare Serenitatis. They form an attractive pair and are especially striking when the terminator is nearby.
Lunar Mountains and Valleys
The Moon has mountain ranges as well as craters and plains. Many formed around the edges of enormous impact basins.
The Lunar Apennines
The Montes Apenninus form a curved mountain range along the south-eastern edge of Mare Imbrium.
When the range lies near the terminator, individual peaks may catch the sunlight while the surrounding lower ground remains in darkness. This can make the mountains appear like bright islands floating beyond the illuminated surface.
The Alps and Alpine Valley
The Montes Alpes lie along the northern boundary of Mare Imbrium. Cutting through the range is Vallis Alpes, the Alpine Valley.
The valley is visible through a small telescope under favourable lighting, although its finer central channel requires a larger instrument and very steady air.
The Straight Wall
Rupes Recta, commonly known as the Straight Wall, is a long fault on the lunar surface. It appears as a dark line during the waxing phase and as a bright line after Full Moon when the lighting direction changes.
It is an excellent example of how the same feature can look completely different at different stages of the lunar cycle.
How Much Magnification Should You Use?
The Moon can tolerate more magnification than many faint deep-sky objects because it is so bright, but higher power is not always better.
Begin with low magnification to see the whole lunar disc. Then increase the power gradually to examine craters, mountains and other individual features.
- Low power: Best for locating the Moon and seeing the entire disc.
- Medium power: Often gives the most useful balance of detail, brightness and steadiness.
- High power: Useful for small features only when the atmosphere is steady and the telescope is properly focused.
If the image becomes soft, dim or difficult to keep still, return to a lower-powered eyepiece. A smaller but sharper image usually reveals more than a large blurry one.
Do You Need a Moon Filter?
A Moon filter is not essential, but some observers find it makes viewing more comfortable, particularly when the Moon is gibbous or full.
The filter screws into the bottom of a compatible eyepiece and reduces the amount of light reaching your eye. This can lessen glare and make it easier to observe for longer periods.
A variable polarising filter allows you to adjust the brightness. This can be useful because the Moon’s apparent brightness changes considerably with phase and magnification.
A Moon filter does not reveal detail that the telescope cannot otherwise resolve, but it may improve comfort and make subtle features easier to study.
Browse our telescope filter guide.
Common Beginner Mistakes
Lunar observing is straightforward, but a few common mistakes can make the experience more difficult than it needs to be.
- Starting at maximum magnification: This makes finding and focusing the Moon unnecessarily difficult.
- Assuming Full Moon is always best: Lower-angle lighting often reveals much more surface relief.
- Observing too close to the horizon: Turbulent air and atmospheric haze can soften the image.
- Ignoring telescope cooling: A telescope brought directly from a warm room may produce an unstable image until it reaches the outdoor temperature.
- Trying to identify too much: Concentrate on two or three features during each session.
- Forgetting comfort: A suitable chair can improve your ability to observe carefully for longer periods.
Keeping a Lunar Observing Log
An observing log helps you remember what you saw and encourages you to look more carefully.
You can keep the record in a notebook or on a computer. For each session, note:
- The date and time.
- The Moon’s phase.
- The telescope or binoculars used.
- The eyepiece and approximate magnification.
- The weather and steadiness of the atmosphere.
- The features you identified.
- Anything unusual or especially impressive.
A simple sketch is also valuable. Draw the shape of the terminator and mark the position of the features you observed. Over time, your sketches will show how much your observing ability has improved.
Can You Photograph the Moon?
The Moon is one of the easiest astronomical objects to photograph.
A smartphone held carefully against a telescope eyepiece can produce a recognisable lunar image. A phone adapter makes alignment much easier and helps keep the camera steady.
With a DSLR or mirrorless camera, the Moon can be photographed using a telephoto lens or attached directly to a telescope with the correct adapter.
Because the Moon is bright, exposures are usually much shorter than those used for stars and nebulae. This reduces the need for complex tracking equipment.
We will cover lunar photography more fully in a future guide, including phone techniques, camera settings and image processing.
Frequently Asked Questions
Can I observe the Moon from a town or city?
Yes. The Moon is bright enough to remain an excellent target under light-polluted skies. Street lighting may reduce your comfort, but it will not hide the major lunar features.
Is it safe to look at the Moon through a telescope?
Yes. Looking at the Moon through a telescope is safe. It may appear dazzlingly bright, especially near Full Moon, but it will not damage your eyes. A Moon filter can make the view more comfortable.
Can binoculars show lunar craters?
Yes. Binoculars can reveal several large craters, the major maria and the uneven surface near the terminator. Mounting the binoculars or supporting your arms will improve the view.
Why does the Moon look reversed in my telescope?
Many astronomical telescopes invert or mirror the image because of their optical design. This is normal and does not affect astronomical observing.
What is the best telescope for observing the Moon?
Almost any telescope can provide satisfying lunar views. A small refractor is easy to use and produces sharp images, while larger reflectors and compound telescopes can reveal finer detail when conditions permit.
Continue Your Lunar Journey
The Moon is the perfect first target because it rewards every level of experience. A beginner can identify the broad maria through binoculars, while an experienced observer can spend hours studying tiny craterlets, ridges and changing shadows.
Do not feel that you need to learn the whole lunar map at once. Choose a few features, observe them under different lighting conditions and gradually build your knowledge from one lunar cycle to the next.
Each return to the Moon offers a slightly different view. The changing angle of sunlight ensures that there is always something new to discover.
- Explore the Moon’s craters, maria and history.
- Read Apollo: Humanity’s Journey to the Moon.
- Compare telescope eyepieces for lunar observing.
- Explore Moon filters and other telescope filters.
Clear skies, and enjoy your first journey across the lunar surface.